Wednesday, March 26, 2014

Work Catering #39: have a break! Have a KitKat .. cheesecake!

Sorry... another cheesecake post! But this one is different!! it's got KITKAT bars in it XD I have made a similar cheesecake using Tim Tams.. and Cherry Ripes. Any other suggestions for chocolate bars? =P

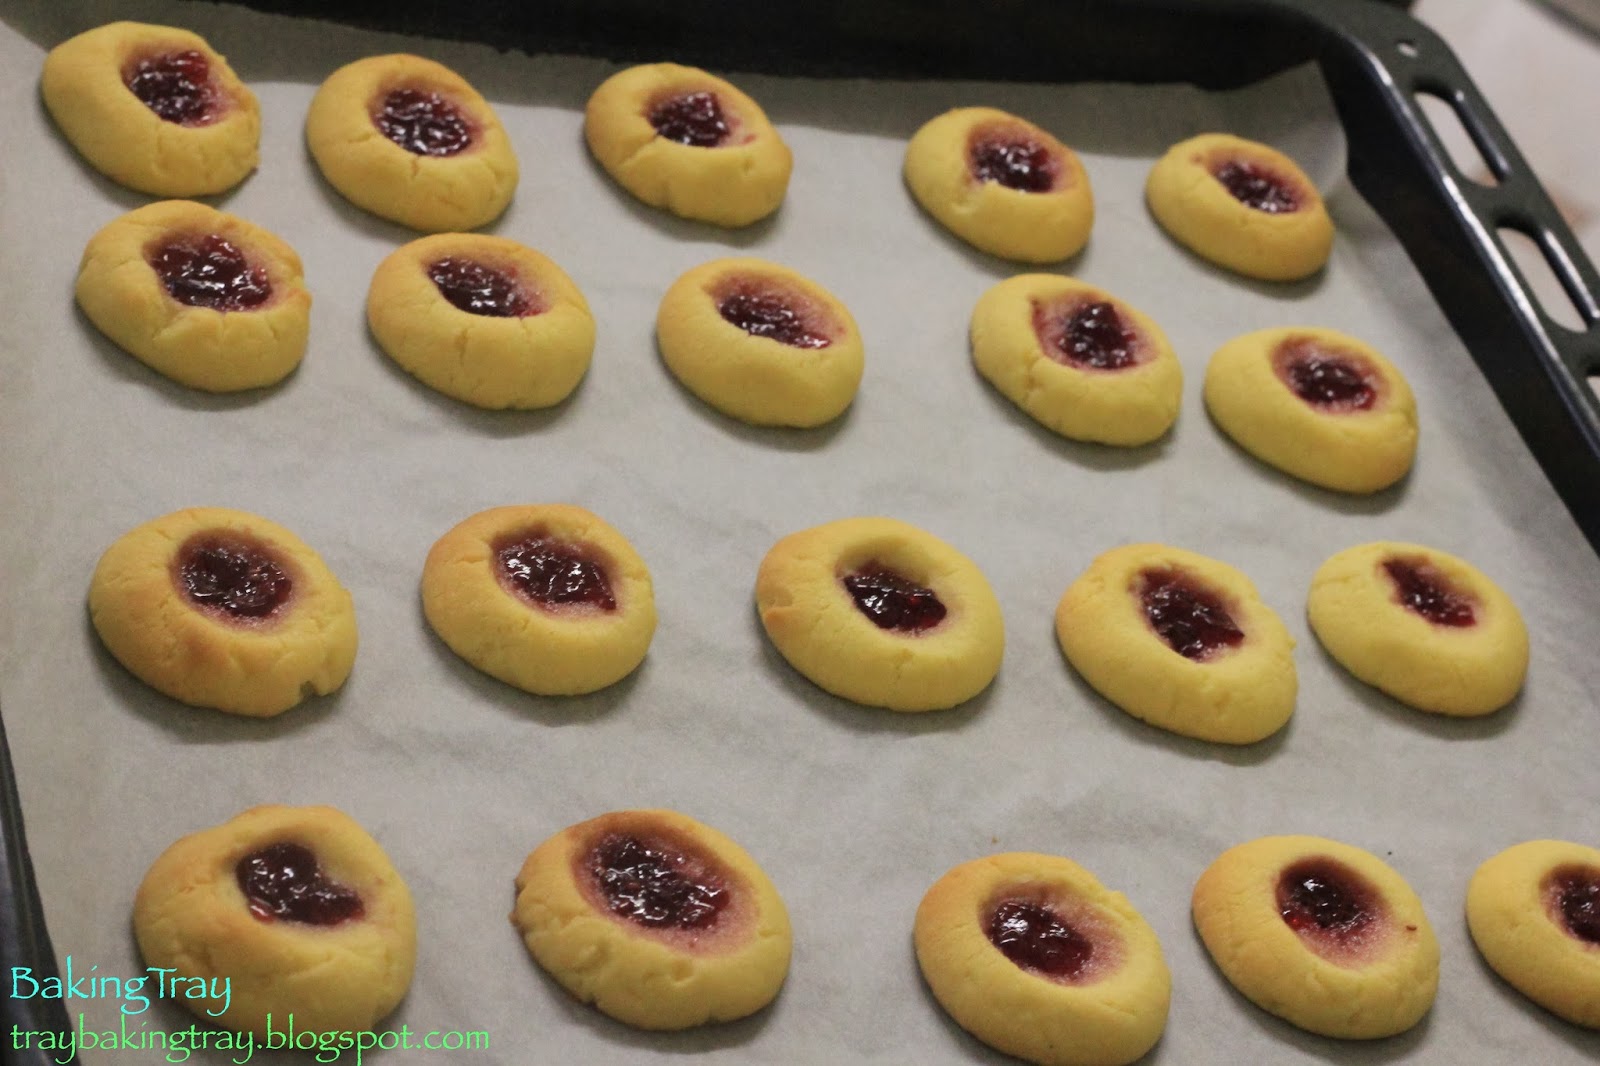
Also made some blueberry cookies. I always enjoy putting fruit into cookies but usually I used dried fruit however this time I tried out fresh fruit! Enjoy the recipes :D

KIT KAT Cheesecake Slice
Recipe adapted from Bakers Corner
Ingredients
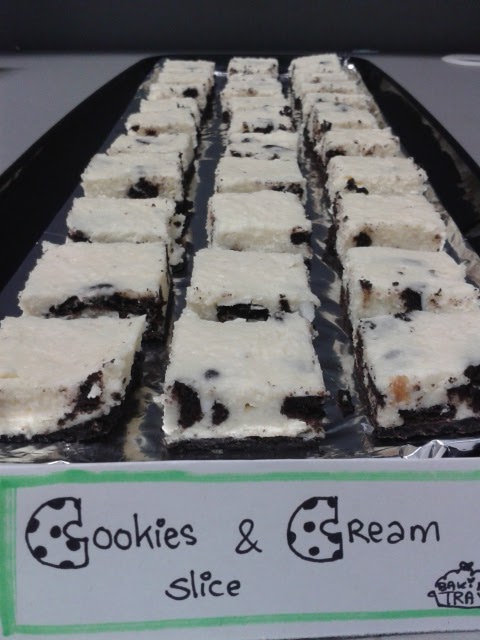
250g plain chocolate biscuits
100g unsalted butter, melted
375g cream cheese, softened
1 can (395g) sweetened condensed milk
1/2 cup (125ml) thickened cream
2 tsp powdered gelatine
1 1/2 tbs boiling water
1 tsp vanilla essence
180g Kit Kat, coarsely chopped
45g Kit Kat, extra, coarsely chopped

1. Line a 20x30cm pan with foil.
2. Process/Crush chocolate biscuits until fine. Add butter and process until well combined. Press mixture firmly over the base of prepared pan. Refrigerate while making filling.
3. Beat cream cheese with electric mixer until smooth. Beat in condensed milk and cream until well combined. Dissolve gelatine in water, then add to cream cheese mix. Beat in vanilla then fold in chopped Kit Kat pieces.
4. Carefully pour mixture into prepared base. Sprinkle with extra Kit Kat pieces and refrigerate for 4 hours or overnight. Cut in squares and serve.

Look at the Kit Kat chunks!! XD
Brown Sugar Blueberry Cookies
Recipe adapted from The Baker Upstairs

Ingredients
113g butter, softened at room temperature
3/4 cup packed brown sugar
1 egg
1 tsp vanilla essence
1 3/4 cups plain flour
1/4 tsp salt
1/2 tsp baking powder
1 1/2 tsp cinnamon
1 tbs milk
3/4 cup fresh blueberries (I used frozen)

1. Preheat oven to 190oC. Line 2 baking trays with baking paper.
2. Beat butter and sugar with an electric mixer until smooth. Add egg and vanilla and mix well to combine.
3. Stir in flour, baking powder, salt and cinnamon with mixer on low speed. Mix until dough comes together then add milk. If dough still dry and crumbly, add 1 tbs milk at a time until it comes together.
4. Carefully fold in blueberries. Refrigerate for 30 minutes.
5. Remove dough from fridge. Roll teaspoonful of dough and place on baking tray. Bake for 10-12 minutes or until golden.

I'm not sure if it was because I used frozen blueberries, but the cookies were a bit soft. I think the moisture from the frozen blueberries may have softened the cookies after they were baked however the flavours were still there. It actually tasted like cookie dough so I didn't mind ^^ The cinnamon, brown sugar and blueberry went really well together.
Cookie time!

Wednesday, March 19, 2014

Work Catering #38: So CHEESECAKEY!!

If you have been reading my blog, you will know that I LOVEEEE CHEESECAKE!!! It's the one cake that I could live off if I was ever stuck on a deserted island... and I wouldn't be sick of it XD There are just SOOO many different cheesecakes out there! Baked.. frozen...chocolate.. fruity... mini... slice...  the list goes on!
So for catering this week I decided to bake a classic carrot cake with a twist. Surprisingly I have not made carrot cake before! (GASP! I KNOW!) It's such a classic and I love the cream cheese frosting (MY FAVOURITE FROSTING!) so I discovered this recipe that combined carrot cake with cheesecake - a twist on the original cream cheese frosting. The base is carrot cake, while the topping is baked cheesecake. This slice is best served chilled so try and be patient and chill in fridge before eating ^^ if you can...
ok i know.. uneven layers >_>
Carrot cake cheesecake slice
Recipe adapted from The Sweets Life

Ingredients
Carrot Cake
1/2 cup brown sugar
1/2 cup caster sugar
1 1/2 cups plain flour
1 tsp baking powder
1/2 tsp bicarb soda
1/2 tsp salt
2 tsp ground cinnamon
1/4 tsp ground allspice
1/4 tsp ground nutmeg
2 tsp vanilla essence
1/3 cup chopped pecans
1/3 cup shredded coconut
1/3 raisins
1 1/2 cups grated carrot (about 2 large carrots)
1 large egg
1/2 cup vegetable oil

Cheesecake
500g cream cheese, softened
1 can (395g) sweetened condensed milk
1/4 cup sour cream
pinch of salt
1/2 tsp vanilla essence
2 large eggs

1. Preheat oven to 180oC and line rectangular baking pan (20x30cm) with baking paper.
2. Beat all carrot cake ingredients in a large bowl with an electric mixture until a thick dough forms (a stand mixer is great for this). Press dough into prepared pan, spreading an even layer. Set aside while you prepare filling.
3. In a separate bowl, beat cream cheese with electric mixer until fluffy. Beat in condensed milk until smooth. Make sure to scrape down sides of bowl. Add sour cream, salt, vanilla and eggs. Mix until combined.
4. Pour cheesecake mixture over the carrot cake base, spreading evenly. Bake for 20-25 minutes, or until just set. The centre should have a slight wobble.
5. Allow to cool completely before covering and refrigerating until bars are set, for 2-3 hours or best overnight. Cut into squares and serve chilled.

Was def a winner at work! they loved it :D
One bite is not really enough...
Next up are these cute little choc cheesecake cups! The smaller the dessert.. the more you can eat right? XD These are just the right size and no bake! You could make them in larger cups or even a cake tin, just double the recipe.

Chocolate Cheesecake cups
Recipe adapted from DK learns to cook
Ingredients
Base
250g Nice biscuits
100g butter, melted
4 tbs cocoa powder

Filling
250g cream cheese, softened at room temperature
1/4 cup icing sugar
1/2 tsp vanilla essence
150g dark chocolate
150g thickened cream

1/4 cup milo

1. Process/Crush biscuits with cocoa powder until fine. Add melted butter and mix well. Press 1/2 tsp into base of small cups.
2. Beat thickened cream until soft peaks form and refrigerate. Melt chocolate in microwave and allow to cool.
3. Beat cream cheese until smooth. Add in icing sugar and vanilla and beat until combined.
4. Mix melted chocolate into cream cheese mixture until combined.
5. Mix 1/3 of cream into mixture. Add remaining cream and fold until no white streaks remain.
6. Carefully spoon cream cheese mixture into cups. Dust with milo and refrigerate for at least 8 hours before serving. 
Lots of mini cups! mmm

dont forget the spoons! hehe

Looks like chocolate mousse yeah?
So get out there!! Make some cheesecake!! :D I'm sure I'll have many more cheesecake recipes to come! But here's some you can check out :)
 http://traybakingtray.blogspot.com.au/2013/03/work-catering-14-peaches-and-cookies.html
 http://traybakingtray.blogspot.com.au/2014/02/mini-blueberry-cheesecakes.html 

Monday, March 10, 2014

THE "Cinnamoncake"

I think these are the most delicious pancakes I have made in a long time! Thanks to the recipe by the SORTED guysA cross between a Cinnamon scroll + Pancake = Cinnamoncake! It's quick and easy and the pancakes were really light and fluffy due to the buttermilk. If you don't have any buttermilk you can MAKE YOUR OWN! Yes!! Just add 1/2 tbs of white vinegar or lemon juice to the 150ml of milk and let it stand for 5 minutes.... then TA DA~~ just like magic it turns into buttermilk ^__^ 

Cinnamon Swirl Pancakes
Recipe adapted from SORTED food

Ingredients
75g salted butter
75g dark brown sugar 
1 tsp ground cinnamon
1 cup (150g) self-raising flour
1 tsp baking powder
2 eggs
150ml buttermilk (or 1/2 tbs white vinegar + 150ml milk)
pinch of salt
knob of butter to cook

1. In a small bowl, beat butter, sugar and cinnamon together till smooth and lump free. Transfer mix to piping bag/sandwich bag and set aside.
2. Mix flour and baking powder in separate bowl. Crack in the eggs and stir to mix. Keep whisking while you slowly add the buttermilk. Add pinch of salt and mix until smooth batter.
3. Heat large, non-stick frying pan to medium heat. Rub with butter. Spoon heaped tablespoon of pancake mixture into pan and cook for 30 seconds. Pipe a thin line of spiral on top of raw batter and leave for another 30 seconds.
swiiirrrllll~~
4. Flip pancake over quickly and cook for another 30 seconds. Transfer cooked pancake to plate. Wipe pan clean to get rid of any burnt sugar and repeat process to cook the rest of pancakes.

You can check out their youtube video here! 

My pancakes didn't exactly look like theirs because I didn't have DARK brown sugar, hence the piping mixture is quite light.. and I also forgot to wipe the pan clean so there was a bit of caramelisation happening.. :/ but all in all... yummy fluffy pancakes =D and addictive!!!
yum yum yum :D
Anyways it's a public holiday todayyy~~~ so for those in Victoria.. enjoy it :D maybe make some pancakes... or bake some cookies or bread!! or go out and have some brunch =) such a lovely day~~~ as for me! Gonna do some BAKING!! YAY!!!

Tuesday, March 4, 2014

Banana Chocolate Chip Cinnamon Rolls

Yet another recipe from Sally's baking addiction! I think I might have an addiction.. to this BLOG! hahah Must give her full credit~ there's just so many recipes that I want to bake after looking at the photos. They make you *DROOL*! and they also don't seem too difficult!

Banana Chocolate Chip Cinnamon Rolls
Recipe adapted from Sally's baking addiction

Ingredients

Rolls
2 1/4 cup plain flour
1/2 cup plain flour (extra)
3 tbs (45g) caster sugar
1 tsp salt
1 packet dried yeast (7g)
120ml water
60ml milk
2 1/2 tbs (38g) unsalted butter
1 large egg

Filling
2 tbs (30g) unsalted butter, softened
1/2 cup mashed banana
1 1/2 tsp ground cinnamon
1/4 cup (50g) caster sugar
1/3 cup (60g) mini chocolate chips

1. Make dough by adding flour, sugar, salt and yeast in a bowl.
2. Heat water, milk and butter together in a microwave until butter is melted. Stir the butter mixture into the flour mixture. Add the egg and enough of the extra flour to make  a soft dough. Dough will be ready when it gently pulls away from the side of the bowl and has elastic consistency.
3. On a lightly floured surface, knead dough for about 5-6 minutes. Place in bowl, cover with cling wrap and allow to rise for around 10 minutes.
4. Roll the dough out into a rectangular shape. In a small bowl, mix mashed banana with softened butter and spread over dough. Mix together the cinnamon and sugar and sprinkle over the top. Sprinkle over the chocolate chips. Roll up the dough tightly. Cut into 12 even pieces and plate in lined round cake tin. Loosely over rolls with foil and allow to rise in warm place for 60-90 minutes.
Lots of filling spread on the dough.. it's like a banana choc pizza XD
Arranging the slightly gooey rolls in the cake tin
5. After the rolls have doubled in size, preheat oven to 190oC. Bake for 25-30 minutes and lightly browned. Cover rolls with foil after 15 minutes to avoid tops burning.
Ta da~ golden brown!
I found the filling a little bit wet so maybe next time I won't mash the bananas up too much. Also feedback from the family was that the flavours don't really match.. but I think they do!! I guess it might have been a bit too sweet.... so next time I'll try berries! or even savoury cheesey ones! mmmm~~ the rolls were deliciously soft and fluffy though :D
Lovely, soft and fluffy rolls :)
Anyways if you have any suggestions just leave a comment =D Till next time~~

Wednesday, February 26, 2014

Work Catering #38: Thème français

A belated post because I've been on a mini holiday ^_^ 
Went to watch the LION KING :D it was soooo awesome!! Brought me back to my childhood~ with all the songs.. Hakuna matata!

Anyways back to the baking! Last week a french reporter from France24 came to work to film a documentary about our head of Immunology Department (who is French).. something to do with French people coming to Aus for research! So I decided to have a French theme to my bakes =) and of course the first thing I thought of was MACARONS
I wanted to experiment with colours and tried to make a French flag themed macaron! As you can see the colours are a bit off... the red could have been redder.. and the blue.. darker! But oh wells! I tried XD
You can find the recipe for the macarons here. I split the batter into 2 parts and added blue dye to one and red dye to the other. I think a gel dye rather than a liquid dye would probably work better. The macaron shells are sandwiched with white chocolate ganache which can be made by mixing 50ml thickened cream with 100g white chocolate in a bowl over a double boiler.
They may not look like white chocolate flavoured but they are sandwiched with white chocolate ganache~
Kind of uneven sizes :/
There are many fancy french pastries that I could choose from but decided to go for the safe option of Palmiers! Delicious puff pastry sprinkled with sugar, rolled up into a pretty heart shape and baked in the oven until caramelised! MMmm...
Just caramelised!
The only danger is not to bake them for too long or else the toffee will burn and become bitter.
Cinnamon Palmiers
Recipe adapted from Jessica Gavin
Circle of.... palmiers~~~
Ingredients
1 cup caster sugar
2 1/2 teaspoons cinnamon
3 sheets puff pastry, thawed

1. Preheat oven to 200oC and line 2 large baking trays.
2. Combine sugar and cinnamon together in a bowl.
3. With a rolling pin, roll out the puff pastry sheet to create a slightly flatter and even surface. 
4. Sprinkle surface of puff pastry with cinnamon sugar mixture until evenly coated. Using rolling pin, roll over the sugar surface to help mixture adhere to puff pastry.
5. Flip pastry over and repeat step on the other side. 
6. Fold sides of puff pastry towards the centre so they go halfway to the middle. Fold them again so the two folds meet exactly at the middle of the dough. Then fold 1 half over the other half to resemble a closed book.
7. Chill dough for 15 minutes to allow the butter to harden slightly before cutting and prevent melting into the dough.
8. Slice the dough into 1.5cm slices and place on lined baking tray. For a more heart shaped palmier, slightly separate the tops of the cookie dough to resemble bunny ears.
Little bunny ears
9. Bake for 12 minutes then turn over and bake for another 4 minutes or until lightly caramelised.
10. Transfer palmiers to a cooling rack.
Different carmalisation :/
But deliciously crunchy and sugary :D

I'm having a break from catering the next two weeks... but will update you on some other bakes soon =) Till then, HAPPY BAKING!!!!

Sunday, February 16, 2014

Birthday Bake: Coffee and crumbs!!

Another birthday bake! This time for a work friend. Last time I made her a chocolate cake because she loves chocolate ^^ but this year I wanted to do something a little different. I know she also likes coffee so was looking up recipes for coffee flavoured cakes but came across this super crumb coffee cake! I only realised as I was making it that it did not involve coffee at all. It was named in this way so you can eat it whilst sipping nice cup of coffee~ I just loved the crumb on this cake.. it really was SUPER CRUMB! YUM!
Ok so it's not the prettiest cake in the world but nice, sweet and moist cake with super crummy and sugary crumb ^_^

Super Crumb Coffee Cake
Recipe adapted from Sallys baking addiction

Ingredients
2 cups plain flour
1 cup caster sugar
1 tsp salt
140g unsalted butter, softened
1 tsp baking powder
1/2 tsp bicarb soda
3/4 cup buttermilk (I just used just under 3/4 milk + 1 tbs white vinegar and left it for 5 min at room temperature)
1 large egg
2 tsp vanilla essence
2/3 cup brown sugar
2 tsp ground cinnamon

1. Preheat oven to 180oC. Grease and line 20cm round cake tin.
2. Whisk flour, caster sugar and salt together in large mixing bowl to combine. Mix in the butter with a fork until mixture resembles course crumbs. Set aside 1 cup of flour mixture.
3. Add baking powder and bicarb soda into the remaining flour mixture. Add buttermilk, egg and vanilla and mix until batter is smooth and fluffy. Pour the batter into prepared tin, smoothing the top.
4. Add brown sugar and cinnamon to reserved flour mixture. Sprinkle the crumbs over the batter, pressing lightly so they stick.
5. Bake for 45-50 minutes or until skewer inserted into the centre comes out clean. Allow to cool for 10 minutes then remove from tin.

Finished cake! not the neatest...
Deliciously moist :D

Thursday, February 13, 2014

Work Catering #37: First of 2014! A raspberry theme~

YAY! My work catering series is back!! One of the things that I have been most looking forward to at work =p (maybe im in the wrong job.. hmm..)
tasty cookies~
My bakes this week had a raspberry theme! Not sure why but I was just in the mood of using raspberries ^_^" First up is a Raspberry Cheesecake Brownies.. combining two of my favourite sweets: Cheesecake and Brownies! I found this recipe on this new blog I have been following: Sally's Baking Addiction. You guys should really check it out!!! It's such a wonderful and colourful blog and the photos just make you drroooolllll!!! and also make you want to bake (like I did XD).
Raspberry Cheesecake Brownies
Recipe adapted from Sally's Baking Addiction

Ingredients

Fudge Brownies
1/2 cup (115g) unsalted butter
225g dark chocolate melts
1 cup caster sugar
3 large eggs
1 tsp vanilla essence
3/4 cup plain flour
1/4 tsp salt

Raspberry Cheesecake Layer
250g cream cheese, softened at room temp
1/4 cup caster sugar
1 egg yolk
1/4 cup raspberry jam
1/4 cup raspberries for topping

1. Preheat oven to 180oC. Grease and line baking pan (20x30cm).
2. To make the brownies, place the butter and chocolate in medium saucepan on medium heat and stir constantly till both are melted. Remove from heat and allow to cool (~10-15 minutes should be fine).
3. Stir in sugar and mix until combined. Add in eggs one at a time, mixing until incorporated before adding next egg. Mix in vanilla. Gently fold in flour and salt. Pour batter in prepared pan.
4. To make the cheesecake layer, beat together the cream cheese and sugar with electric beater until smooth. Add in egg yolk and beat until combined. Beat in raspberry jam.
5. Dollop spoonfuls of cream cheese mixture on top of brownie batter. Glide a knife through the layers to create a swirl pattern. Sprinkle and press a few raspberries on the top.
6. Bake for ~30 minutes or until skewer inserted into the centre comes out clean. Cover the brownies after 20 minutes of baking to stop the top from over browning. Allow brownies to cool completely before cutting into squares.
Loving the layers

bright pop of rapsberries ^^
The next recipe I tried also involves raspberry jam!! They are essentially thumbprint/jam drop cookies but made up of shortbread. I have previously made jam drop cookies but wasn't too happy with the result. However this shortbread recipe was really good as the cookies did not spread so much so the jam stayed in the holes xP and it's EGG FREE!

Raspberry Shortbread Cookies
Recipe adapted from Melding Magic
Ingredients
225g butter, softened
2/3 cup caster sugar
2 cups plain flour
1/2 cup raspberry jam

Glaze
1 cup icing sugar
3 - 4 tsp warm water
1 tsp vanilla essence

1. Cream butter and sugar in large bowl with electric mixer.
2. Add in flour and beat on low speed and well combined. Cover and refrigerate for at least 1 hour.
3. Preheat oven to 180oC and line 2 baking trays with baking paper. Shape teaspoonsful of dough into balls. Place 1 inch apart onto tray. Using your thumb or end of wooden spoon handle, make an indent in the centre of each cook. Fill with jam.
Filling holes with jam
4. Bake for 14 minutes or until edges are lightly brown. Allow to cool.
Cooked cookies :D
Allowing them to cool....
5. Make glaze by mixing sugar, water and vanilla in small bowl. Drizzle over cookies.
Ready to eat :D
Close up of the drizzle! looks like white chocolate but it's not XD
Well stay tuned for more work catering bakes and other random recipes~~^_^ and try these out! they're really simple!!!!