Showing posts with label cookie. Show all posts

Friday, April 10, 2020

Levain Bakery Style Cookies - Baking with Tray ep. 2

Hello again! 

Yesterday on my "Baking with Tray" live bake session on instagram I made Levain Bakery Style Cookies! I haven't actually been to Levain Bakery before ... so unsure of what the cookie is supposed to taste like... but I've seen so many videos and posts of these style of cookies that I wanted to try it out!


I have to say... these cookies were delicious! Big, chunky, chocolately, crispy on the outside and soft in the middle!

There are so many recipes out there but I decided to go with a recommended one by Cupcake Jemma! 


Levain Bakery Style Cookies
Recipe adapted from Cupcake Jemma

Ingredients
(Makes 6 Large cookies)

115g cold butter, cubed
80g caster sugar
80g light brown sugar
200g choc chips (I used 100g dark and 100g milk)
50g walnuts, roughly chopped
100g self raising flour
150g plain flour
1/8 tsp salt
1/8 tsp bicarb soda
1 tsp baking powder
1 large egg, beaten

1. Place butter in a large bowl and beat to loosen butter.
2. Add sugars and beat again until just combined.
3. Add chocolate chips and walnuts and mix to combine. 
4. Add dry ingredients (flours, salt, bicarb soda and baking powder) and mix until a breadcrumb like consistency.
5. Add the beaten egg and stir until just combined. 
6. Form into rough balls weighing 125g each. Cover in cling wrap and freeze for at least 90 minutes.
7. Preheat oven to 180oC and place a lined baking tray in the oven. Put frozen balls at least 2 inches apart (to allow for spreading) on preheated baking tray and bake for 17-20 minutes (depends on your oven).


Great thing with this recipe is that you can bake from frozen! So you can always have stash in your freezer :D 

Happy baking! Till the next episode.... :)

Wednesday, March 26, 2014

Work Catering #39: have a break! Have a KitKat .. cheesecake!

Sorry... another cheesecake post! But this one is different!! it's got KITKAT bars in it XD I have made a similar cheesecake using Tim Tams.. and Cherry Ripes. Any other suggestions for chocolate bars? =P

Also made some blueberry cookies. I always enjoy putting fruit into cookies but usually I used dried fruit however this time I tried out fresh fruit! Enjoy the recipes :D

KIT KAT Cheesecake Slice
Recipe adapted from Bakers Corner
Ingredients
250g plain chocolate biscuits
100g unsalted butter, melted
375g cream cheese, softened
1 can (395g) sweetened condensed milk
1/2 cup (125ml) thickened cream
2 tsp powdered gelatine
1 1/2 tbs boiling water
1 tsp vanilla essence
180g Kit Kat, coarsely chopped
45g Kit Kat, extra, coarsely chopped

1. Line a 20x30cm pan with foil.
2. Process/Crush chocolate biscuits until fine. Add butter and process until well combined. Press mixture firmly over the base of prepared pan. Refrigerate while making filling.
3. Beat cream cheese with electric mixer until smooth. Beat in condensed milk and cream until well combined. Dissolve gelatine in water, then add to cream cheese mix. Beat in vanilla then fold in chopped Kit Kat pieces.
4. Carefully pour mixture into prepared base. Sprinkle with extra Kit Kat pieces and refrigerate for 4 hours or overnight. Cut in squares and serve.

Look at the Kit Kat chunks!! XD
Brown Sugar Blueberry Cookies
Recipe adapted from The Baker Upstairs

Ingredients
113g butter, softened at room temperature
3/4 cup packed brown sugar
1 egg
1 tsp vanilla essence
1 3/4 cups plain flour
1/4 tsp salt
1/2 tsp baking powder
1 1/2 tsp cinnamon
1 tbs milk
3/4 cup fresh blueberries (I used frozen)

1. Preheat oven to 190oC. Line 2 baking trays with baking paper.
2. Beat butter and sugar with an electric mixer until smooth. Add egg and vanilla and mix well to combine.
3. Stir in flour, baking powder, salt and cinnamon with mixer on low speed. Mix until dough comes together then add milk. If dough still dry and crumbly, add 1 tbs milk at a time until it comes together.
4. Carefully fold in blueberries. Refrigerate for 30 minutes.
5. Remove dough from fridge. Roll teaspoonful of dough and place on baking tray. Bake for 10-12 minutes or until golden.

I'm not sure if it was because I used frozen blueberries, but the cookies were a bit soft. I think the moisture from the frozen blueberries may have softened the cookies after they were baked however the flavours were still there. It actually tasted like cookie dough so I didn't mind ^^ The cinnamon, brown sugar and blueberry went really well together.
Cookie time!

Thursday, October 31, 2013

Work catering #34: Gluten free bake!

I received a few mini recipe books in the mail from CSR (yes the sugar brand!) because they were free!! Gotta love freebies XD anyways one of them was full of GLUTEN FREE recipes ^^ I've always wanted to bake gluten free desserts but... I was a little scared~ I mean, what happens if the utensils I use have residues of gluten then I use them to bake... then.. it wouldn't be gluten free would it?

hahha.. ok maybe I think too much ^_^" Anyways.... so here are the recipes =)
Raspberry Jam Slice
Recipe adapted from "Gluten Free Delights" by CSR

Ingredients
Base
1 cup (150g) almond meal
1/2 cup (45g) fine desiccated coconut
1 cup (150g) gluten free plain flour
1 1/4 cups (275g) Raw Caster sugar (I actually didn't like the little "crunchy" raw bits of the sugar so I think next time I will just use regular caster sugar and probably bring it down to 1 cup)
1/2 cup (125g) unsalted butter, melted
2 egg yolks
1 tsp cold water

Filling
3/4 cup raspberry jam
1/2 cup frozen raspberries

Topping
2 egg whites, lightly beaten
2 1/2 cups (215g) shredded coconut
1/3 cup (50g) soft icing sugar

1. Preheat oven to 170oC (150oC fan forced). Grease and line 20x30cm baking tray with baking paper.
2. Base: combine all dry ingredients in a large bowl. Mix the butter, yolks and water in separate small bowl. Add wet ingredients to dry ingredients and mix until well combined. [OR.... you can just put everything in a food processor if you own one ^^]. Press into tray and bake for 20 minutes or until gold brown. Allow to cool.
3. Filling: Spread jam over base then sprinkle on raspberries.
4. Topping: Combine egg whites, shredded coconut and icing sugar and mix until combined. Spread over jam and bake for 30-35 minutes or until golden.
5. Cool in pan and cut into slices.
I found the slice to be quite sweet... So that's why I suggested reducing the amount of sugar. The crunchy coconut topping was nice though :) Oh this is what it looked like in the book.

And this is what mine looked like =p

Love the redness of the jam!

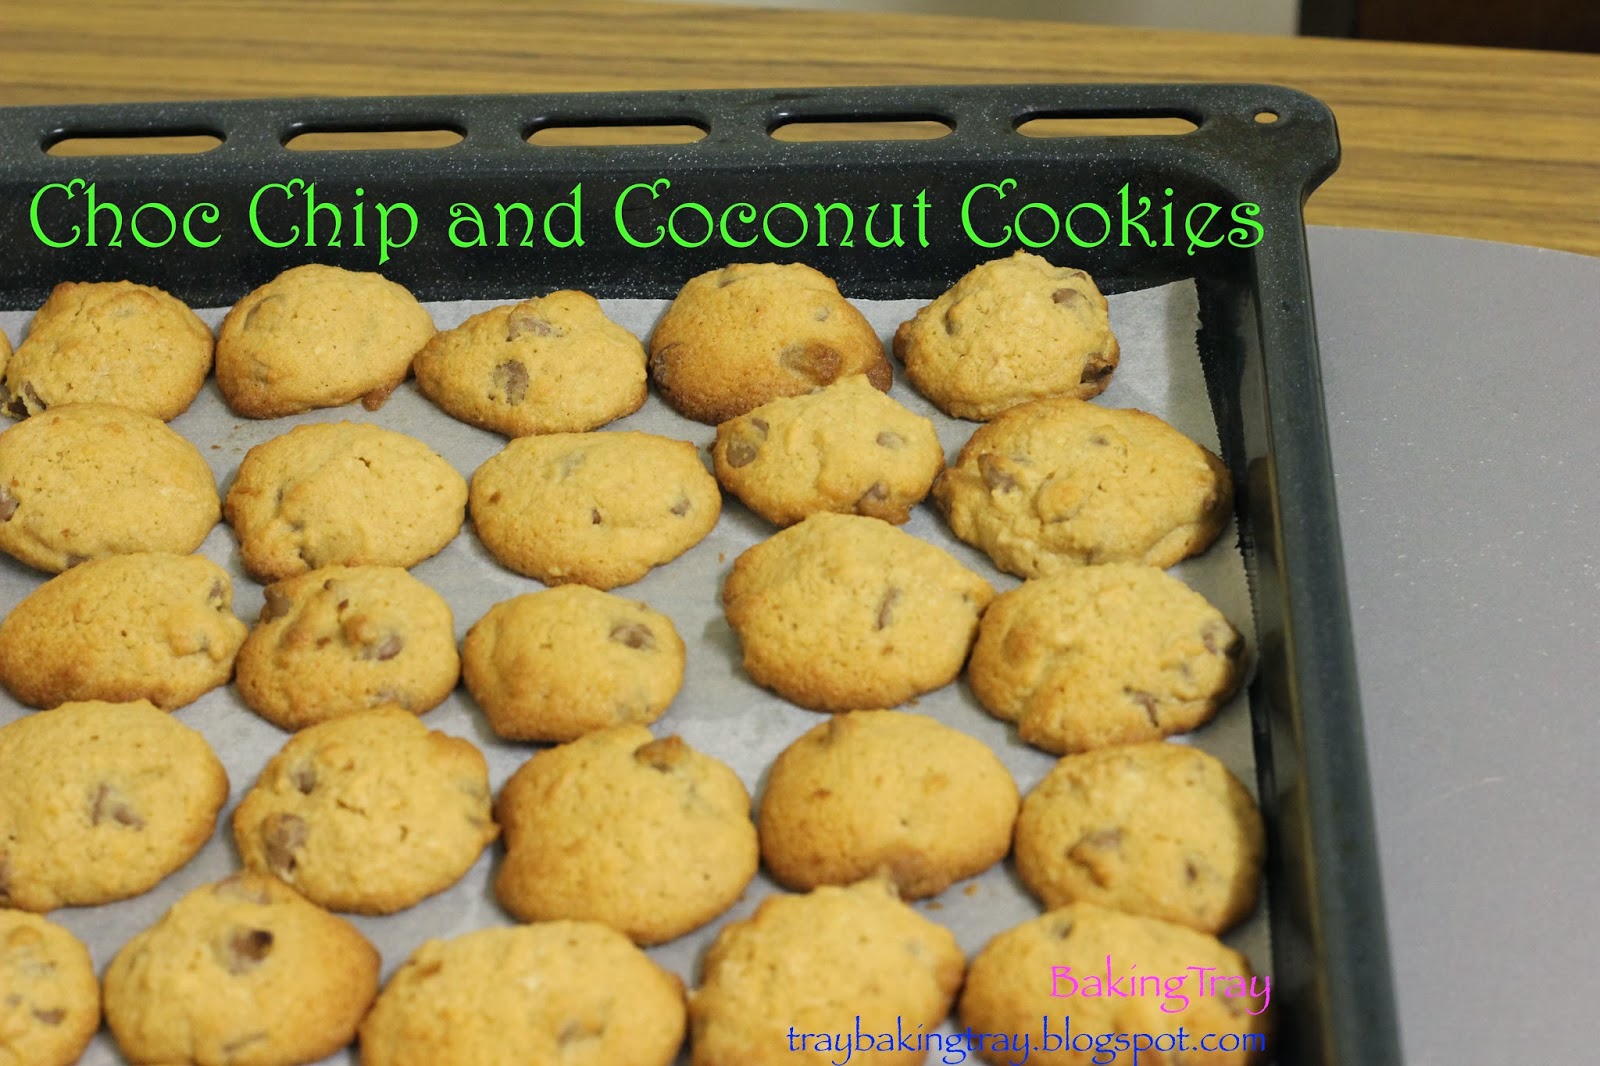
Gluten Free Choc chip and coconut cookies
Recipe adapted from "Gluten Free Delights" by CSR

Ingredients
3/4 cup (185g) unsalted butter, softened at room temp
1 1/4 cup (200g) brown sugar
2 large egs
1 1/2 cups (225g) gluten free plain flour
1 tsp baking powder
1 1/2 cups (130g) desiccated coconut
1/2 cup (75g) almond meal
230g dark chocolate chips

1. Preheat oven to 200oC (180oC fan forced) and line 3 baking trays with baking paper.
2. Beat butter and sugar until pale and creamy. Add eggs one at a time, beating well after each addition.
3. Sift flour and baking powder together and add to mixture along with coconut, almond meal and choc chips. Mix until well combined. (If you find the mixture is quite wet and runny like I did, add a little more flour)
4. Place teaspoons (or tablespoons if you want bigger ones) of cookie dough onto baking trays, allowing room for the cookies to expand. Bake for 12-15 minutes or until golden.

I had a little trouble with the texture of these cookies because the dough was a bit wet so I added in a little more flour to get the consistency I was after. These cookies are the soft cakey type but the coconut really gives it a different texture and taste. This is what it looked like in the book..

Mine were a little different... haha

Anyways as it is still October, I would like to submit this to Aspiring Baker's #36: Choc-a-cookie (October 2013) hosted by Genie of Honeybee916food.

Thursday, June 20, 2013

Work catering #23: Nutella + Cream Cheese = HEAVENLY NUTELLA CHEESECAKE!


Last week I was asked to cater for two sessions (yay! so happy they asked me ^_^) so did a lot of baking! One was for a morning tea so I made Orange and Poppy Seed cake and Blackforest cheesecake, both recipes that I have tried before.

Fanned out~~~


Close up of cake - u can see the poppy seed and orange rind
So now to the next exciting recipe!!! As promised, it is another Nutella recipe =D Remember last week how I made Apple crumble cheesecake and Nutella cookies? Well a colleague at work misheard and thought I made Nutella cheesecake! XD and I thought what a great idea~ so after some blog research I found this recipe for NUTELLA CHEESECAKE! It's super easy (as the original recipe title stated xP)
Nutella Cheesecake
Recipe adapted from ChocolateSuze
Ingredients
250g Nice biscuits
100g butter, melted
1 tsp vanilla essence
2 x 250g cream cheese
100g icing sugar
1/2 cup thickened cream
400g Nutella

1. Process/Crush biscuits until fine. Add melted butter and combine. Press into base of lined baking tray (20 x 30cm) and chill in fridge for ~ 30 minutes.
2. Beat cream cheese, icing sugar and vanilla essence with electric mixer until smooth mixture formed. 
3. Beat in Nutella until smooth. Beat in cream until mixture looks shiny and mousse-like.
4. Dollop mixture onto biscuit base and smooth the surface. Place in fridge for a couple of hours or best overnight.
Bite size squares of Nutella Cheesecake
As there was no gelatin added I thought they might turn to mush but they actually held their shape after being in the fridge overnight. It was quite rich so you can't eat too much... but oh so good ;p....

Next up is something a little fun! Colour M&M cookies ^_^

M&M Cookies
Recipe adapted from Mad cooking fusions

Ingredients
2 cups plain flour
225g butter, softened at room temp
1 egg
1/2 cup brown sugar, firmly packed
1/2 cup caster sugar
1/2 tsp baking powder
1 tsp vanilla essence
a pinch of salt
1 cup M&Ms

1. Preheat oven to 180oC and line 2 baking trays with baking paper.
2. Cream butter and sugars with electric mixer until light and fluffy. Add egg and vanilla and beat until well combined.
3. Add flour, baking powder and salt and mix with wooden spoon until combined. 
4. Roll teaspoons of cookie dough into small balls and place on lined baking tray. Gently press to flatten with the palm on your hand. Decorate with M&Ms and bake for approx. 15-20 minutes or until edges turn light brown.
so many COOKIES :D :D :D
Colourful~~~~
Sometimes if it's too hot the M&M's will crack >.<"
These cookies are a lovely snack! and not just for kids =p Big kids too!!! ^______^

Tuesday, May 28, 2013

Work catering #21: BakingTray recognised :)


I wasn't able to make the lunchtime seminar last week but I still catered :) And I was very touched to here that the speaker's supervisor actually said thank you for the catering ^____^v really happy to hear people appreciate my baking =) =)

Then I met a friend to give her some baked goodies and she said she bumped into a work colleague who attended the seminar and said my baking was yummy ^_^" awww.. so nice to hear that =D Is this the beginning of BakingTray catering business? HAHA! who knows~

So this time I made cheesecake and cookies. The cheesecake was a bit softer than normal, maybe I didn't add enough gelatine.... I actually froze a piece for a couple of days and I have to say, tastes delicious frozen!!! Oh and if you love Cherry Ripe then I'm pretty sure you'll love this slice!

Cherry Choc Cheesecake Slice
Recipe adapted from Baker's Corner
Ingredients
200g Nice biscuits, crushed
1/3 cup (25g) desiccated coconut
125g butter, melted
250g cream cheese, softened at room temp
1/4 cup (60ml) lemon juice
1 can (395g) condensed milk
3 tsp gelatine
1/4 cup (60ml) boiling water
300ml thickened cream
3 x 55g cherry ripe bars, finely chopped

1. Grease and line 20x30cm baking pan with foil. 
2. Combine biscuits, coconut and butter in bowl. Press mixture firmly into base of pan and refrigerate for around 30 minutes.
3. Beat cream cheese, lemon juice and condensed milk with electric mixer until smooth. Dissolve gelatine in boiling water. Fold into cream cheese mixture. 
4. In separate bowl, whisk cream until soft peaks form. Fold into cream cheese mixture.
5. Fold in chopped cherry ripe bars. Pour mixture over base. Refrigerate for 2 hours or until set. Cut into squares and serve~
Stretched out! haha they weren't that wide
Close up of cherry choc cheesecake slice - the bits of Cherry ripe oozing out
Chocolate Caramel Fudge cookies
Recipe adapted from Baker's corner
Ingredients
65g butter
1/2 cup (75g) dark chocolate chips
2 eggs
120g caster sugar
150g brown sugar
2 tsp vanilla essence
2 cups (300g) plain flour
1/3 (35g) cocoa powder
3/4 tsp baking powder
3/4 cup (140g) caramel choc chips

1. Preheat oven to 180oC/160oC fan forced. Line 2 baking trays with baking paper.
2. In a small saucepan over low heat, add butter and dark chocolate chips. Stir occasionally until melted. Remove from heat and cool for 5 minutes.
3. Stir in eggs, caster sugar, brown sugar and vanilla essence.
4. In a separate bowl, sift flour, cocoa powder and baking powder. Stir in chocolate mixture and caramel choc chips. Mix until combined. Roll teaspoon dough into balls and place on prepared trays. Bake for 10 minutes. Stand cookies on trays for 5 minutes before  transferring to wire rack to cool.
MMmm big pile of delicious cookies!
Close up of cookies! YUMMYYYY!

The cookies were indeed FUDGEY! :D Mmm.. could dig into some right now~~
Oh and OOPS on the labelling xD

Sunday, May 12, 2013

Work catering #19: Cookie Fix

The theme for this week's catering was COOKIES! I made Cookies and Cream slice and White Chocolate and Cranberry Cookies. 

Delicious white choc and cranberry cookies ^^
I used the same dough recipe as the Green Tea and White chocolate cookies but left out the green tea and added 1/2 cup cranberries. You can find the recipe here. I love the flavour and texture of these cookies because they taste a bit like short bread. The dough is really simple to make and the great thing is you leave it overnight in the fridge and the next day all you have to do is SLICE and BAKE! One thing I learnt from my previous batch is to roll the dough out into a thinner tube so you can slice more cookies :) This time I made around 40-50 as compared to 30 something last time.
Tray of cookies!
The chunks of white choc and cranberries! YUM!
You can also customise the flavour! Any flavour combination suggestions? :D

Sunday, May 5, 2013

Work catering #18: 2nd attempt at Caramel Slice

Close up of caramel slice
When you fail at a recipe, the easiest thing you can do is just ignore it and find something else you are good at baking XD!! But I really wanted to try out making Caramel Slice again. Previously, I used the wrong type of coconut for the base so I wasn't too happy with it. That was my colleague's secret recipe that I was unable to share, however I found this recipe for "The Best Ever Caramel Slice" on Baker's corner. Not too sure about the "best ever" part but it was pretty yummy ^^
Previously caramel slice, not looking too great
New Caramel slice looking much better ^^ even layers of base and caramel!
The Best Ever Caramel Slice
Recipe adapted from Baker's corner

Ingredients
1 cup (150g) plain flour
1/2 cup (110g) brown sugar
1/2 cup (40g) dessicated coconut
125g butter, melted
100g butter, extra
2 x 395g cans condensed milk
1/3 cup (80ml) golden syrup
200g dark chocolate, melted
1 tbsp vegetable oil

1. Preheat oven to 180oC/160oC fan forced. Grease and line slice tin (20x30cm) with baking paper.
2. Combine flour, sugar and coconut in bowl. Add melted butter and mix well. Press mixture firmly into prepared tin. Bake for 15-20 minutes until lightly browned. 
3. Meanwhile, place extra butter, condensed milk and syrup in medium saucepan. Stir over low heat until smooth. Pour over base and bake for 20-25 minutes until golden. 
4. Combine dark chocolate and oil in bowl and stir until smooth. Pour evenly over slice. Allow to set before slicing and serving.
All gone in a flash~~
Also on my to-bake-list has been these jam drop cookies. Basically a cookie with a little drop of jam in the middle. I used strawberry and apricot jam but the list is endless :) Really simple to make, just make sure those hole you indent is a bit deeper so the jam doesn't run out.

Jam drop cookies
Recipe adapted from taste.com.au

Ingredients
125g butter, softened
1/2 cup (100g) caster sugar
1 egg
1 cup (150g) self-raising flour
1/4 cup (35g) custard powder
1/4 cup (90g) raspberry or apricot jam

1. Preheat oven to 180oC. Line two baking trays with baking paper. 
2. Beat butter and sugar in bowl with electric mixture until pale and creamy. Add egg and beat until just combined. Add flour and custard powder and stir with wooden spoon until just combined.
3. Using lightly floured hands, roll 1 1/2 teaspoons of mixture into small balls. Place on baking trays allowing room for spreading. 
4. Use lightly floured finger or end of wooden spoon to make an indentation in centre of each ball. Spoon 1/2 tsp of jam into the centre of each biscuit. Bake for 15 minutes or until lightly golden. Allow to cool on trays before serving.
Cookies were a little bit too brown! haha
Close up of cookies. 

Thursday, April 25, 2013

Work catering #17: Green Tea Time! (my Aspiring Baker's entry)

Since this month's Aspiring Baker's theme is all about TEA!! I decided to kill 2 birds with one stone.. so to speak =p Any recipes that use tea (not coffee) are accepted so I played around with my favourite tea... GREEN TEA =D Also known as Matcha!
Perfect bite size green tea cheesecake bites :D

I use Green Tea powder bought from a local asian grocer and use it just like cocoa powder ^_^" So you just add it straight into your dough or cake mix. It has a subtle flavour, not too sweet with a slight bitterness. New exotic and interesting flavour for some of my work colleagues =p

First up is CHEESECAKE! These little bites are the perfect size and they are so smooth!!! Like eating Green Tea mousse :D
Green Tea Cheesecake Bites
Recipe adapted from The Hungry Excavator

Ingredients
250g Arnotts Nice biscuits
120g unsalted butter, melted
300ml thickened cream
250g cream cheese
1/2 cup caster sugar
150ml milk
3 tbsp green tea powder
3 tsp powdered gelatin
4 tbsp boiling water

1. Grease and line baking tray (20x30cm) with baking paper. 
2. Crush biscuits in food processor until fine crumbs. Stir in melted butter and mix until well combined. Press tightly into base of tray and refrigerate for 30 minutes.
3. Beat thickened cream with electric beater until soft peaks form. Set aside.
4. Place cream cheese in separate bowl and beat until smooth. Add sugar and beat until well combined.
5. Place gelatin in small bowl and mix with water. Set aside.
6. Heat milk in small saucepan until just comes to the bowl. Remove from heat and whisk in green tea and gelatin until dissolved and no lumps are seen.
7. Add milk to cream cheese and beat until smooth. Fold mixture into thickened cream until even. 
8. Pour mixture over crumb layer and spread evenly. Chill for at least 3 hours or overnight.
silky smooth ~~
Ready to serve!
Close up. You can see the green tea specks
And to compliment these cheesecake bites, I made some COOKIES! The great thing with this recipe is that you make the dough the night before, leave it in the fridge to rest and the next day, all you have to do is slice up into cookies and bake! ^___^

Stack of cookies
Green Tea and White chocolate Cookies
Recipe adapted from Nami from Just One Cookbook

Ingredients
240g plain flour
15g green tea/matcha powder
150g unsalted butter, softened at room temp
130g pure icing sugar
pinch of salt
2 egg yolks 
1/2 cup white chocolate chips

1. Sift flour and matcha powder together and set aside.
2. Cream butter and sugar until light and fluffy.
3. Add yolks and salt and beat well.
4. Gradually fold in flour and matcha. 
5. Shape the dough into 2 logs and wrap them tightly in cling wrap. Rest in fridge overnight.
~THE NEXT DAY~
6. Preheat oven to 150oC and line 2 baking trays with baking paper. Slice cookies into 7mm thickness and place on baking tray.
7. Bake for 20 minutes or until slightly golden. Allow to cool on rack.
Tray of cookies! yum yum!
These cookies are the melt in your mouth texture. The flavours of the green tea and white chocolate go so well together! I also love the GREENESS to it ^^" really delicious cookies!

Gone quite quickly ^_^"
Close up of GREEN-NESS!

So I am submitting this post to Aspiring Baker's #30: It's Tea Time! Hosted by Food Playground
HAPPY BAKING =D!!!! Why not try out using Green Tea? =)