Showing posts with label cream cheese. Show all posts

Thursday, February 2, 2017

I AM BACK!!!

Hi all!!!
Baking Tray is BACK!!!! It's been a very very long time since my last post.. 2.5 years in fact! 
Many things have happened in the last 2.5 years... I think I got a lot busier and also stopped work catering so stopped the weekly blog post. I also got an instagram account so I used that to post my bakes ^^" It was easier to post a photo then blog about it =p (lazy...)

I have also recently got married and moved interstate!! So lots have been going on! But as I am currently unemployed I thought might as well revive the blog! I have still been baking a lot! Baked for my own wedding ^^" I've also found my own blog useful as a collection of recipes for whenever I feel like baking something.

So to begin a new year (2017... and yes I realised it's February so already a month into the year.. but hey! Chinese new year was just a few days ago :P) here is my FIRST POST!!! And hopefully many more to come in the future =)


I've begun a journey to bake the most perfect light and fluffy Japanese Cheesecake! I've yet to find the best recipe but this one is very easy with only 3 ingredients! Although it does not have the height that I would like, it still tastes delicious :)

Japanese Cheesecake
Recipe adapted from Epicurious

Ingredients
250g white chocolate melts
250g block of cream cheese (at room temperature), cubed.
6 eggs, separated (at room tempterature)

1. Preheat oven to 180oC. Grease and line 8 inch cake tin. 
2. Melt white chocolate in bowl over a double boiler.
3. Add cubes of cream cheese and melt.
4. Remove from heat and mix in 6 egg yolks.
5. In a separate bowl, beat egg whites with electric beater until stiff peaks form.
6. Add one third of egg whites into chocolate mix and gently fold in. Fold the remaining egg whites in 2 additions until just combined.
7. Pour mix into prepared cake tin. Place pan in a baking dish/roasting pan and add warm water to reach halfway up the side of the cake tin. Bake until cheesecake is set (around 40-45 minutes). 
8. Turn off the oven and leave tin in oven for 15 minutes then transfer to wire rack to cool completely. Remove cheesecake from tin and transfer to a platter. Refrigerate for at least 4 hours before serving. 

Things to improve: Mine did not turn out so light and fluffy. It may have been due to not beating egg whites enough and also the size of the pan. I will try again!! 

Friday, April 11, 2014

Cream cheese swirled chocolate bundt cake! Another farewell cake :(

Another farewell.. =( This time for a friend who finished her PhD :) so I guess it's kind of exciting~ she went back to Malaysia so decided to make a cake for her. This cake was inspired by this chocolate bread I tried from THE DOUGH COLLECTIVE in Sydney. I hope this place comes down to Melbourne! They have all kinds of bread, but one of the best is the Double Chocolate Finger Roll - chocolate bread with chocolate chips and chunks of cream cheese. It's DELISH!
Cream cheese swirled Chocolate Bundt Cake
Recipe adapted from Baker Street

Ingredients

Cream Cheese Swirl
1/4 cup caster sugar
250g cream cheese, softened at room temp
1 egg
1 tsp vanilla

Chocolate cake
2 cups plain flour
1 1/2 cups caster sugar
1 cup water
1/2 cup cocoa powder
113g unsalted butter, softened
3 eggs
1 1/4 tsp baking powder
1 tsp bicard soda
1 tsp vanilla essence

Glaze
4 tbs icing sugar
2-3 tbs milk

1. Preheat oven to 180oC and grease bundt tin.
2. For the cream cheese batter, beat the cream cheese and sugar with electric mixer until well combined. Add in egg and vanilla and beat until smooth. Set aside.
3. For the chocolate cake, combine all ingredients in large bowl of stand mixer. Beat at low speed, scraping the bowl often until all ingredients are moistened. Increase speed until well combined.
4. Pour ~3 cups of batter into bundt tin. Spoon cream cheese layer over batter without touching sides of pan. Cover with remaining batter.
creating a swirled pattern
5. Bake for 45-50 minutes or until skewer inserted in center comes out clean. Cool in pan for 30 minutes then remove and cool completely.
6. For the glaze, mix sugar and milk together in small bowl until you reach a spreadable consistency. Drizzle over cooled cake.
Cream cheese centre! YUM!
Ok so it's not much of a "swirl" but more of a "chunk" of cream cheese~~ but still yummy ^^ I think I'm in a bundt cake phase~ Been looking up many bundt cake recipes so stay tuned for more :)

Tuesday, April 8, 2014

Work Catering #40: Blondies vs. Brownies

Which do you like better? Blondies or Brownies? I made both for work last week~! Well technically the blondies weren't "blondies" because they didn't have any white chocolate in them... and it was a bit biased because the brownies had cream cheese and Kit Kats...so of course the brownies won XD But they were both yummy :D 

I was still in a Kit Kat phase from last work catering, so I decided to use them in a brownie!

Kit Kat Cream cheese Brownies
Recipe adapted from Bakerella
Ingredients
Brownie
3/4 cup plain flour
1/2 cup unsweetened cocoa powder
1/4 tsp salt
1/2 tsp baking powder
150g unsalted butter
1 1/2 cups caster sugar
3 eggs
2 tsp vanilla
4 x 45g package Kit Kat bars

Cream cheese topping
250g cream cheese, softened at room temp
2 eggs
2 cups icing sugar
1 tsp vanilla

1. Preheat oven to 180oC and grease and line a 20x30cm baking pan.
2. Sift flour, cocoa, salt and baking powder in medium bowl and set aside.
3. Melt butter in microwave. Stir in sugar, then eggs one at a time. Add vanilla and mix until well combined.
4. Add dry ingredients. Stir until combined then pour into prepared pan. Gently press 16 individual Kit Kat bars on top of brownie batter.
5. To make the topping, beat cream cheese with electric mixer until smooth. Beat in eggs one at a time to mix until combined.
6. Gradually add icing sugar and then vanilla. Mix until smooth. Pour on top of brownie batter.
7. Bake for 45-50 minutes or until skewer inserted into centre comes out clean. Place a sheet of foil on top of pan for the last 10-15 minutes to avoid over browning.
8. Remove from oven and cool completely. Chill in refrigerator for a few hours or overnight before slicing and serving - I was too impatient and I think that's why it was quite hard to slice XD was too warm and sticky! haha

Falling brownies....
The cream cheese topping wasn't quite what I was expecting. It was quite soft and pretty sweet but I think the layer was just the right thickness! Any thicker and it would have been overly sweet.
Did I tell you that some of these were stolen? :O
I put them in the work fridge overnight and the next day most of them were gone~
To balance out the sweetness we have some tart apple harvest "blondies". I like the texture of the nuts on top and also bits of cream cheese ^^

Apple Harvest Blondies
Recipe adapted from Recipe Girl

Ingredients
150g unsalted butter
2 1/4 cups packed brown sugar (divided)
3 large eggs
2 cups plain flour
1 tsp baking powder
1 tsp vanilla essense
2 medium apples, peeled and chopped (I used granny smith apples for tartness)
125g cream cheese (you can freeze to make it easier to chop later)
3/4 cup pecans or walnuts, finely chopped
1 tsp ground cinnamon

1. Preheat oven to 170oC. Grease and line 20x30cm baking pan. 
2. Melt butter in saucepan over medium heat. Once melted, remove from heat and stir in 2 cups of brown sugar. Mix well and add eggs one at a time, mixing well after each addition. 
3. Add flour, baking powder and vanilla essence and mix well. Fold in apples.
4. Pour batter into prepared pan. Chop cream cheese into small bits and mix with nuts, cinnamon and remaining 1/4 cup brown sugar. Sprinkle evenly over batter.
5. Bake for 30-35 minutes or until golden brown.
Pretty moist and full of fruit :D
and Golden!
I wonder why they are called Apple harvest blondies... 

Thursday, February 6, 2014

Mini Blueberry Cheesecakes

I had another baking day in my last week of holidays! A friend wanted to learn how to bake so taught how to make mini blueberry cheesecakes. 
colourful cheesecakes :D
These are great because you won't feel guilty after eating one.. since they are small =p But then again.. you might end up eating more :O

I used the same recipe as my mini cheesecakes (recipe here) but added in 1/2 cup of blueberries into the cream cheese mixture. Don't over mix otherwise everything will turn purple =p Just half mix the blueberries in to create a blueberry swirl.
blueberry swirls~
To make Blueberry topping/compote:
1. Combine 1/4 cup of blueberries, 3 tbs water and 1 tbs caster sugar in a small saucepan.
2. Cook over a medium heat - try crushing the blueberries so more juice will come out :)
3. In a small bowl mix 1 tsp corn flour with 2 tbs of cold water. Slowly stir corn starch mixture into the saucepan and cook until sauce thickens. Remove from heat and allow to cool.
4. Place a teaspoon of topping onto each cheesecake.

bare cheesecake.. slightly sunken
YUMMMMYYYYY!!!
Will have more cheesecake recipes coming up shortly~~!!!

Wednesday, December 18, 2013

Cupcake baking with Special guest: Cakestory!!!

I am so thankful to have the opportunity to work with Wen from Malaysia who is the founder of Cakestory in Malaysia ^__^ A cupcake catering business! hehe! Found out we have a lot of things in common (mainly baking) and I hope that I can set up my catering business one day! Or maybe even a collaboration~! You guys should check out her facebook page! Many yummy cakes there :D
Lemon Blueberry Cupcakes (with Cream cheese frosting)
Recipe adapted from Cakestory

Ingredients

Cupcakes
1/2 cup (113g) unsalted butter, softened at room temperature
1/2 cup (100g) caster sugar
3 large eggs
1 tsp vanilla essence
1 1/2 cups (195g) cake flour (I just used plain flour)
1 1/2 tsp baking powder
1/4 tsp salt
1/2 cup buttermilk
1/2 cup blueberries, fresh or frozen
Lemon zest for decoration

1. Preheat oven to 180oC and line 18 holes of muffin pan with cupcake cases.
2. Beat butter and sugar with electric beater until pale and fluffy. Add eggs one at a time, beating well after each addition. Beat in vanilla.
3. In a separate bowl, whisk together the flour, baking powder and salt.
4. Alternately add the flour mixture and the buttermilk mixture in three additions, beginning and ending with flour.
5. Toss the blueberries in 1 tsp plain flour to coat - this helps the blueberries maintain their shape. Fold the blueberries into the cake mix.
6. Fill cupcake cases with batter (~2/3 full) and bake for 15 minutes or until skewer inserted into centre comes out clean. Remove from oven and allow to cool on wire rack.

Cream cheese frosting
500g cream cheese, softened at room temperature
160g soft icing sugar
160g unsalted butter, softened at room temperature
Juice of 1/2 lemon

1. In stand mixer with paddle attachment, beat cream cheese until smooth.
2. Add in icing sugar and butter and beat until smooth.
3. Squeeze in juice of 1/2 lemon and beat until incorporated.

Assembly
  • Fill piping bag with frosting and pipe swirls of frosting onto cupcake. If you have star tips, it would look even prettier! unfortunately I don't :(
  • Place blueberry on the top together with a sliced lemon zest.
Pro piping skills =p even without a tip!
pretty in blue :)
BakingTray & Cakestory
We had a great day baking! Also used the leftover cream cheese frosting for macaron filling~ Coffee flavoured macaron shell with cream cheese frosting! YUM! If you guys come up with any suggestions on what to call this new flavour... leave a comment below! We wanted to call in "Tiramisu" but realised that uses mascarpone cheese
.. not cream cheese! Oops!!
New macaron flavour that needs a name!!
Check out our feast!!! :D

Thank you Cakestory for sharing your knowledge and tips =) Hope to use this recipe again and try out other flavours!
Wen from Cakestory and her delicious cupcakes ^_^
So that's all from me in 2013!!! Off to Brisbane tonight! cannot wait!! :D
Still have so many posts yet to publish but that shall wait till next year =D 
Happy baking people!! 

Thursday, November 7, 2013

Work Catering #35: Tim Tam Balls!!!!! and sticky date!

Yes that's right! First came the Oreo Cheesecake Balls... and now it's Tim Tam Balls!!! My friend showed me this recipe and my first thought was "Only 3 ingredients! Only 3 steps!" (so lazyyyy =_=") but so delicious!! Actually, don't know why I didn't think of it earlier. If you can use Oreos, there are thousands of other biscuits you can use! Just process them, mix them with cream cheese, roll them into balls and TA DA!!!

Anyways, decided to make them a little more fancy by coating them in white chocolate and giving them a sprinkle of MILO ^^

Tim Tam Balls
Recipe adapted from Favourite Food Recipes
Ingredients
1 packet Tim Tams (250g)
250g block cream cheese, softened at room temperature
300g cooking chocolate (milk, dark or white.. it's up to you!), melted

1. Crush/Process Tim Tams. Add cream cheese and mix together until combined.
2. Roll into balls (1 tsp of mix). Refrigerate for 10 minutes.
3. Coat with melted chocolate and refrigerate until set.


coated in smooth white choc~~and a sprinkle of MILO~
inside... Tim Tam deliciousness!!!
I've also been wanting to make sticky date pudding - it's also one of those classic bakes but it seemed to always go down the list because I get distracted with cheesecakes or.. Tim Tam balls!!! hahha! anyways had some sticky date pudding at work the other day and it was sooooo good! So good that it gave me the motivation to make it :D the butterscotch sauce is definitely worth making!!!

Sticky Date Pudding with Butterscotch Sauce
Recipe adapted from Citrus and Candy

Ingredients
250g pitted dates, chopped
1 tsp bicarbonate soda
1 1/2 cups (375ml) boiling water
160g unsalted butter, softened at room temperature
1 cup packed brown sugar
1 tsp vanilla essence
2 eggs
2 cups self raising flour

Butterscotch Sauce
1/2 cup brown sugar
150ml thickened cream
1/2 tsp vanilla essence
30g butter

1. Preheat oven to 180oC. Grease and line rectangle baking tin (20x30cm) with baking paper.
2. Place dates and bicarb soda in a bowl. Pour over boiling water and stand for 20 minutes.
3. In a separate bowl, cream the butter, sugar and vanilla together until light and fluffy. Add the eggs one at time, beating well after each addition.
4. Fold through the date mixture (including the water) and flour until well combined. (The mixture may look really wet and watery but it'll work!)
5. Spoon the mix into baking tin and bake for 30-35 minutes or until skewer comes out clean. Cool in tin for 5 minutes before cooling on wire rack.
6. Make the butterscotch sauce but combining all ingredients into a medium saucepan. Bring to a boil over medium heat, constantly stirring. When boiled, reduce heat to low an simmer for a few minutes until darkened and thickened.
7. To serve, prick warm cake all over with skewer and pour a third of the butterscotch sauce over the cake. Allow to soak through for 10 minutes. Cut into square pieces and spoon extra sauce to serve.
More like sticky date cake slab! haha
Lil sticky squares ^^
With a chopped date on top :D all for presentation~

Friday, September 13, 2013

Work catering #29: Cream cheese theme~


I love everything cream cheese! I mean, who doesn't? You can make frozen cheesecake.. cream cheese frosting... baked cheesecake.. slices.. cakes.. so much variety!!! =D =D OR you can just eat it by itself =p haha ok.. maybe that's going a little too far!

After recipe searching, I found this delicious recipe for Green Tea cream cheese brownies! YUM! everything I love~~ Green tea.... cream cheese... brownies!! =D

Green tea cream cheese brownies
Recipe adapted from dailydelicious
Ingredients
Green tea cream cheese batter
170g cream cheese
35g caster sugar
1 tbs plain flour
1 egg
30ml thickened cream
2 tsp green tea powder

Brownie batter
70g plain flour
1/4 tsp baking powder
1/4 tsp salt
130g unsalted butter
200g dark chocolate
175g caster sugar
3 eggs

1. Preheat oven to 180oC and line 23cm square pan with baking paper.
2. To make green tea cream cheese batter, beat cream cheese and sugar together until smooth.
3. Add cream and egg and beat until smooth. Sift green tea powder and stir until combined. Add flour and stir to combine. Set aside.
4. For brownie batter, place butter and chocolate into saucepan over medium heat and stir until melted.
5. Add sugar and salt and sugar until combined. Remove from heat and allow to cool for 5-10 minutes. (if the batter is too hot, it will scramble the eggs!)
6. Beat eggs together and add to bowl, stir to combine.
7. Sift over the flour and baking powder and stir until smooth. Pour batter into prepared pan. Spoon the green tea cream cheese batter on top and swirl with a knife to create marbled effect.
8. Bake for 40-45 minutes. Don't overcook it (as I almost did!) as it can become dry.
Brownie squares =D
See the marbled top? ^^
I also made my oreo cheesecake balls! (sticking to the cream cheese theme =p). You can find the recipe here.

Hmmm..... looking for more inspiration for next bakes! Feel free to give me suggestions!! =D

Monday, August 19, 2013

Work catering #25: BakingTray back baking balls and slices!


It's been a while since I catered for work! Really missed it actually ~ So what to bake for my comeback? haha...well a friend showed me this recipe (THANK YOU ^^) and as soon as I saw it, I thought "YES! MUST BAKE!". Not only is it a no-bake recipe, but only needs 3 ingredients (well 4 including the white chocolate)! and you know me? I can be the lazy baker.

Oreo cheesecake balls
Recipe adapted from Kraft recipes

Ingredients
450g oreos (3 x 150g packets should be enough)
250g block cream cheese, room temperature
250g dark chocolate melted
50g white chocolate, melted

1. Process oreos until resembles fine crumbs.
2. Mix oreo crumbs with cream cheese until combined.
3. Roll into small balls. Place on tray and refrigerate for 10 minutes.
4. Coat balls in dark chocolate and place on tray.
5. Pipe white chocolate squiggles on top and refrigerate.
Balls of oreo cheesecake goodness!
I also had a spare can of passionfruit pulp that I bought the other day so was looking up some passionfruit recipes and found this one for passionfruit slice. Yummy ;)

Passionfruit slice
Recipe adapted from Exclusively food
Ingredients
1/3 cup passionfruit pulp and juice (you can use fresh or canned)
1/2 cup icing sugar
1 cup self-raising flour
1 cup desiccated coconut
125g butter, melted
110ml lemon juice
395g (1 can) condensed milk

1. Preheat oven to 180oC (160oC fan-forced) and line a 20x30cm slice pan with baking paper.
2. Sift icing sugar and flour into large bowl. Add coconut and stir until well combined.
3. Add melted butter and stir until combined. Firmly press mixture over base of pan using back of spoon.
4. Bake for 11-13 minutes or until slightly risen and lightly browned around the edges.
5. For topping, place passionfruit pulp in medium bowl. Add lemon juice and condensed milk and stir until well combined (mixture should thicken).
6. Pour mixture over base and spread evenly with a spatula. Return pan to oven and bake for further 10 minutes.
7. Allow slice to cool in pan before removing and refrigerating before slicing.
Prepped for catering~
You get the crunch of the passionfruit seeds~

I'm glad to be back baking! Actually been on a baking spree XD so lots more posts to come! =D This is what happens when I go a month without baking =p

Wednesday, August 7, 2013

Light as a feather?

BakingTray is back! Had a great holiday in Malaysia and Singapore! Visited lots of relatives, ate heaps of delicious food and shopped a lot too =) Good to be back home though! Unfortunately, down with a virus this week so pretty much confined to the home~ good time to blog though!

Here's one of my last bakes before my holiday: Featherlight Cheesecake. It is essentially a Japanese cheesecake which I have made before. I'm not sure this cake worked 100%, as it wasn't as "featherlight" as I would have liked. I think it shall go on "to repeat" list =p However the flavours were there!! Quite light and cheesecakey =D
Featherlight Cheesecake
Recipe adapted from Peng's Kitchen

Ingredients
200ml milk
20g butter
125g cream cheese
50g plain flour
3 egg yolks
1 tsp vanilla essence
3 egg whites
1/8 tsp cream of tartar
pinch of salt
90g caster sugar
1/2 tbs cocoa powder
1 tbs boiling water

1. Grease and line 20cm square tin with baking paper.
2. Combine milk, butter and cream cheese in bowl over double-boiler and mix until smooth. Cool slightly.
3. Sift over the flour and mix well.
4. Stir in egg yolks and vanilla essence.
5. In a separate bowl, whisk egg whites, salt and cream of tartar until foamy. Gradually beat in sugar until stiff peaks form.
6. Gently fold 1/3 of meringue into cheese mixture. Then pour the cheese mixture into meringue and fold until combined.
7. Mix cocoa powder and water until paste formed. Spoon in some cheese batter and mix until smooth.
8. Pour cheese batter into tin. Drizzle chocolate paste using a knife to create a marbled effect.
9. Place tin in deep baking tray and fill tray with water to create a waterbath. Bake at 160oC for 1 hour.
10. Remove cake from oven and allow to cool before slicing.
not very "fluffy" =/ but still tasty! :D

Wednesday, March 27, 2013

Work catering #14: Peaches and Cookies and cream


Peach season is almost over so time to use up those leftover peaches in the fridge! Whilst looking up peach slice recipes, I came across many blogs and websites sharing this recipe. Bill Granger is somewhat a famous Australian chef and there were many rave reviews for this slice so what was stopping me from trying it out!? nothing! haha! It seemed very simple =) and used everyday ingredients!

Bill Granger's Peach and Raspberry Slice
Recipe adapted from Kitchen Delights

Ingredients
185g (1 1/4 cup) plain flour
1 1/2 tsp baking powder + 1/2 tsp extra
125g chilled and cubed butter
115g (1/2 cup firmly packed) brown sugar
115g (1/2 cup) caster sugar
3 peaches, peeled and sliced
90g raspberries, fresh or frozen
2 tsp vanilla essence
1 egg, lightly beaten
185g milk

1. Preheat oven to 180oC. Grease and line slice tin (20x30cm)
2. Sift flour and baking powder into large bowl. Rub in the butter till resembles fine bread crumbs. Stir in both of the sugars.
3. Press half the mixture over the base of tin. Lay peaches over the top and sprinkle on raspberries.
4. Add vanilla, extra baking powder, egg and milk to the rest of the base mixture and stir well. Pour evenly over the top of the peaches and raspberries. Bake for 1 hour. Cool in tray, then cut into squares.
Ready for catering =D
Thin slices but packed full of flavour
The slice came out thinner than I expected....But it was still nice and sweet =) With the tang of the peach and raspberry.

I think I'm still in a cheesecake phase and needed a new cheesecake recipe. I've been sticking with the same Blackforest Cheesecake for a while because it's so easy but I think it's time for a change. While flipping through the Woolworth's catalogue I found this recipe for Cookies and Cream Slice! Essentially, it's an Oreo Cheesecake! Yum!

Cookies and Cream Slice
Recipe adapted from Woolworths

Ingredients
300g Oreo Classic Cookies
80g butter, melted
375g cream cheese
1/2 cup caster sugar
1 tsp vanilla essence
1 cup thickened cream
3 tsp gelatine, dissolved in 3/4 cup boiling water
200g white chocolate, melted, cooled slightly

1. Place 250g Oreo cookies in food processor and process into fine crumbs. Add butter and process to combine. Press mixtures into lined slice tin (20x30cm) and refrigerate.
2. Beat cream cheese, sugar and vanilla with electric mixer until smooth.
3. Beat in cream until smooth. Stir through gelatine and white chocolate.
4. Roughly chop remaining cookies and stir through the filling, then pour over the base. Refrigerate for 3 hours or until set. 
Black and white squares
Can you see the Oreo pieces?? =D

I'm really happy with this recipe =) and got some good feedback from it! I think the only thing I would change would be to add more chopped oreos into the cheesecake mix but other than that.. super yummy =D

Sunday, February 3, 2013

Work Catering #7: Cupcakes and cookies!

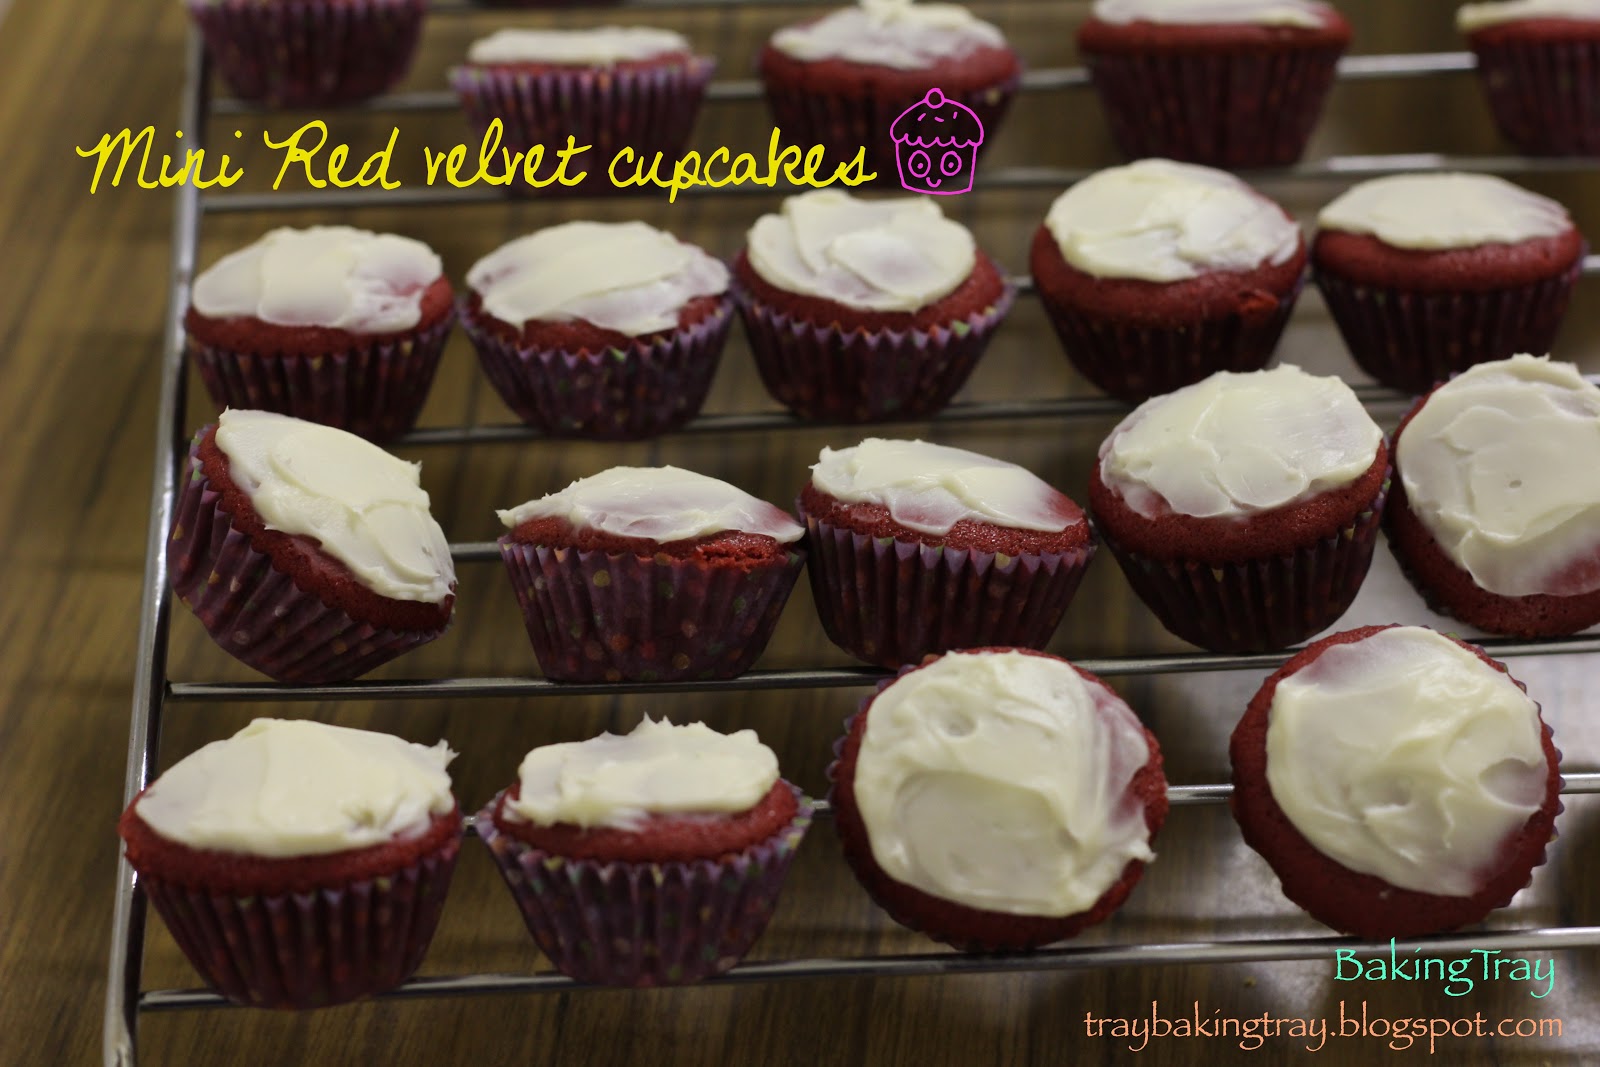
Back into the catering swing of things!! This week it was all about cupcakes and cookies =) I wanted to use the ready made Cream cheese frosting I had bought so I looked back at my previous recipes and found Red Velvet Cupcakes! I made mini cupcakes so I could cater for more people :p
before icing..... Just so you can see the red colour =)
Ready made cream cheese frosting!!
This stuff is the BEST! and actually cheaper and easier than making it myself... sometimes I do get lazy too ;)


My friend ripped out pages of a magazine filled with wonderful recipes for me! thanks!!! So found this simple recipe for cookies (basic dough only using 4 ingredients!!!). It makes a bunch of cookies (~50.. depending on how big or small you make them) and its so simple as well =)

Choc chip and Macadamia cookies
(Recipe adapted from New Idea magazine)

Ingredients
250g butter
200g sweetened condensed milk (1/2 x 395g can)
1/4 cup caster sugar
2 1/2 cups self-raising flour
250g dark chocolate chips
110g macadamia nut halves

1. Pre-heat oven to 170oC and line 3 baking trays with baking paper.
2. Beat butter, condensed milk and sugar in bowl until light and fluffy.
3. Stir in the flour, choc chips and nuts. (You can really add your own flavours! such as M&Ms, raisins, cranberries, walnuts....)
4. Roll teaspoons of dough into balls and place on lined baking tray. Press down with back of spoon or palm of hand to flatten cookie. (remember to leave a bit of space between each one!)
5. Bake for 10 minutes or until golden in colour.
cookies!!! :D
ready for catering~
mini mouthful