Showing posts with label no bake. Show all posts

Tuesday, October 7, 2014

Work Catering #54: It's a no bake week

I guess I wasn't in the mood to use my oven xD I think I was just being lazy and wanted to make some quick and easy desserts. So if you are in a lazy mood, here are some no-bake recipes!!
Strawberries are in season! :D
Brownie Batter Truffles
Recipe adapted from Mel's kitchen café
Ingredients
3/4 cup (96g) cocoa powder
1 cup (200g) caster sugar
1/2 cup packed brown sugar (100g)
pinch of salt
3/4 cup (96g) plain flour
2 tsp vanilla essence
170g butter, melted
250g dark chocolate, melted
sprinkles for garnish

1. Combine cocoa powder, sugars, salt and flour in large bowl. Stir in vanilla and melted butter until the mixture forms a thick batter.
2. Line baking tray with baking paper. Roll teaspoonful of dough into balls and place them on baking tray. Refrigerate for one hour until the brownie batter balls are firm.
3. Coat balls in melted chocolate and place back on the tray. Decorate using sprinkles. Refrigerate until ready to serve.
The inside of the truffle
They were actually really popular XD
The back story behind these truffles is that I actually tasted one and I felt that it was a bit grainy... I think the sugar had not melted with the butter so you could actually taste the grains of sugar >___<" Anyways I was telling my friend that I really wasn't happy with them and she told me "That's what you always say! And they always get eaten up". But this time I was sure it was a FAILURE....

yet again she proved me wrong! Seems like people like eating sugar grains XD 


Next up is super easy Strawberry Pannacotta!! :D Since they are in season now, why not make the most of them? :)

Strawberry Pannacotta
Recipe adapted from Misschieviously
Ingredients
500g strawberries, washed
250ml milk
250ml thickened cream
1/3 cup caster sugar
1 tsp vanilla essence
3 tsp powdered gelatin
3 tbs boiling water

1. Chop strawberries and puree in blender. Pass strawberry puree through a sieve to remove pulp and seeds. (You should get just under 400ml of puree). Keep the pulp and seeds for garnish.
2. Place milk, cream, sugar and vanilla in small saucepan. Heat to a low simmer until sugar has dissolved. Remove from heat and set aside.
3. In a large bowl, mix together the gelatin and 3 tbs boiling water to soften the gelatin. Pour hot milk and cream mixture over the gelatin and stir to dissolve completely.
4. Add in strawberry puree and mix well.
5. Pour into individual glass/cups. Refrigerate for at least 6 hours to set.
6. To serve, garnish with strawberry pulp or fresh strawberries.
pretty pink pannacotta ^^


No excuse not to make these! super quick, super easy and super yummyyy :D 

Tuesday, September 2, 2014

Work Catering #51: Strawberry Oreo Cheesecake

It's strawberry season! hooray~~ so time to use them in some desserts! They add delicious flavour but more importantly COLOUR :D Below is the recipe for this Strawberry Oreo Cheesecake I made. Philadelphia had a special addition Strawberry Cream cheese block so I decided to try it out. It doesn't taste that great by itself but in this cheesecake.. Mmm.. mm.. mmmm!!! I originally made it as a cake and then adapted it into a slice =) I prefer the slice! hehe
Cake version for a friend's surprise birthday~

Strawberry Oreo Cheesecake
Recipe adapted from Little Cake House
Ingredients
200g chocolate ripple biscuits
75g unsalted butter, melted
300g strawberry flavoured cream cheese, softened at room temperature
300ml thickened cream
150g white chocolate, melted
1 tbs water
1 tsp powdered gelatine
150g strawberry Oreos
strawberries to decorate

1. Line rectangular (20x30cm) baking pan with foil. (or if making a cake, a round 23cm springform/cheesecake tin)
2. Process chocolate biscuits until fine crumbs. Add melted butter and mix until combined. Press mixture over base of pan and refrigerate for at least 30 minutes.
3. Put water and gelatine in small heatproof bowl. Place bowl in small saucepan of simmering water until gelatine dissolves.
4. In a large bowl, beat cream cheese until smooth. Add in gelatine and melted chocolate and mix until smooth.
5. Whip cream in separate bowl until soft peaks formed. Gently fold into cream cheese mixture until combined.
6. Break oreos into small pieces and stir into cream cheese mixture. Pour mixture over the prepared biscuit base smoothly the mixture evenly. Refrigerate for at least 4 hours or better, overnight. Decorate with sliced strawberries.
Cheesecake squares! strawberries so red!
Yummy oreos inside~
This was a winner in so many ways! What's not to love? It's cheesecake... it had oreos... and fresh strawberries :D

My next bake was something very american! I had to wiki "snickledoodle" - a type of cookie made with butter/oil, sugar and flour rolled in cinnamon; basically a cinnamon cookie. 
White chocolate snickledoodle blondies
Recipe adapted from Sally's baking addiction

Ingredients
Blondies
2 1/3 cups (290g)  plain flour
1 1/4 tsp baking powder
1/2 tsp salt
3/4 cup (170g) unsalted butter, softened at room temperature
3/4 cup (150g) caster sugar
3/4 cup (150g) brown sugar
2 large eggs, room temperature
2 tsp vanilla essence
1 cup (180g) white chocolate chips
Cinnamon-sugar filling
2 tsp ground cinnamon
1/3 cup (67g) caster sugar

1. Preheat oven to 180oC. Grease and line rectangular (20x30cm) baking pan with baking paper. 
2. Beat butter on high speed in large bowl until creamy. Add sugars and beat until light and fluffy. Beat in eggs and vanilla.
3. Fold in flour, baking powder and salt until combined. Fold in white chocolate chips. Spoon half the batter into pan evenly. 
4. Combine cinnamon and sugar and sprinkle on top of bottom layer, reserving 1 tbs for the top layer. Spread remaining batter over top. Sprinkle with remaining cinnamon-sugar. 
5. Bake for 25 minutes or until golden brown and toothpick inserted in centre comes out clean. 
It's like a cinnamon donut as a blondie!!


I loved the cinnamon sugar layer in the centre! Delicioussss~~
Sorry for my belated posts! still have so many more bakes to blog about!! Till then... HAPPY BAKING :D

Thursday, July 24, 2014

Pretty Pandan Pannacotta

This dessert was for a dinner "party" at my friend's house. She was cooking the mains and I was going to bring dessert. The theme was "asian" so I decided to go for a Malaysian/thai inspired pannacotta. The week before I had tried this AWESOME crepe cake at a Thai restaurant! It was a thai milk tea crepe cake with coconut icecream.. so good!!!
this was the cake! from Jinda Thai~ photo credit to Cut to the cheese
Pandan Pannacotta with Lychee jelly and Coconut cream
Ingredients
Pannacotta
2 cups coconut milk
1 cup thickened cream
1/2 cup sweetened condensed milk
4 tsp powdered gelatin
1/4 cup boiling water
1 tbs pandan essence
1 tsp pandan paste

Lychee jelly
450ml tin lychees
1 packet (85g) create-a-jelly (Aeroplane jelly brand)

Shredded coconut

1. Place cream, coconut milk and condensed milk in saucepan over medium heat. Stir till all combined.
2. Add 4 tbs boiling water to gelatin in small bowl and mix to form a gel. Add gelatin mix into cream mixture and stir till gelatin dissolved.
3. Reserve 1 cup of coconut mixture. Add pandan essence and paste into saucepan and stir until combined. Remove from heat and allow to cool slightly.
4. Pour into jug and pour into plastic glasses (~1/2 full). Drain canned lychees (reserving 200ml lychee juice) and cut each in half. Place 3 lychee halves into each glass and refrigerate for around 1 hour or until set.
5. Empty jelly powder into separate jug, and add 1 cup (250ml) boiling water. Stir and dissolve well. 
6. Add 200ml of lychee juice and stir well. Remove pannacotta from fridge (once set) and pour lychee jelly into each shot glass. Return back to fridge and allow to set.
7. Pour a layer of reserved coconut mixture into each glass.
7. Place shredded coconut on lined baking tray. Bake for around 10 minutes at 200oC or until toasted. Sprinkle coconut onto pannacotta and serve.


3 layered glass dessert :)
Everyone enjoyed the dessert (YAY!) only had a little problem with getting the pannacotta out of the stem of the glass =_=" haha! Pannacotta is really simple to make!! Especially if you do cheats version and leave it in the glass/bowl ^^"

Thursday, June 26, 2014

Work Catering #47: Bacon week!

So apparently it's Bacon week in Australia this week (22 - 28 June). Who knew that something like this existed? Not me! But I looked it up and quite a few famous dessert places are producing bacon desserts! Such as a maple bacon zonut from Adriano Zumbo or Kevin Bacon flavoured gelato from Gelato Messina. It just so happened that I was watching Masterchef and was inspired by this dessert of Peanut Butter Mousse with Grilled Banana and Maple Bacon Crumb made by Emelia~ I also had some leftover bacon from home made brunch the other day (it was sooo good! post to come soon ^^) so decided to do something whacky!! So here's the recipe for my bacon inspired recipe!!!

Bacon and Maple Caramel Slice
Recipe adapted from Baker's corner and also inspired by Epic Millionaire's shortbread by SORTED Food

Ingredients
3 rashers of streaky bacon
1 cup (150g) plain flour
1/2 cup (110g) brown sugar
1/2 cup (40g) desiccated coconut
125g butter, melted
100g butter, extra
2 x 395g cans sweetened condensed milk
1/3 cup (80ml) maple syrup
200g dark chocolate melted
1 tbs vegetable oil
2 tbs maple syrup, extra

1. Preheat oven to 180oC and line a tray and a rectangle baking pan (20 x 30cm) with baking paper.
2. Place the bacon on baking tray and cook for 15 minutes, until very crispy, leave to cool.
3. Blitz the bacon in a food processor until resembles crumbs.
4. Combine flour, sugar, coconut and 3 tbs of bacon crumb in medium bowl. Add melted butter and mix well. Press mixture firmly into base of prepared pan. Bake for 15-20 minutes or until lightly browned. Allow to cool.
5. Place extra butter, condensed milk and syrup in medium saucepan. Stir over low heat until smooth. Pour over base and bake for 20-25 minutes until golden. Allow to cool.
6. Combine melted chocolate, oil and extra maple syrup until smooth. Pour evenly over slice. Sprinkle with remainder of bacon crumb.
Specks of bacon
the signage might have turned people off xP


The overall consensus was that the bacon flavour was not that pronounced... could do with a bit more bacon XD My other suggestion would add some salt flakes into the caramel for a "salted caramel" filling ^^

I also had limited time to bake so made this no bake fudge! Super quick and easy! Only need a microwave!

Cookies and Cream Fudge
Recipe adapted from Kirbie Cravings

Ingredients
1 packet (150g) Oreos, crushed into smaller pieces
3 cups (510g) white chocolate
1 can (395g) condensed milk

1. Line 23cm square baking pan with foil.
2. Combine chocolate and condensed milk in large bowl. Microwave for 30 seconds and stir. Microwave for another 30 seconds and stir until smooth and all chocolate melted.
3. Sprinkle half crushed Oreos across the bottom of the pan. Pour chocolate on top. Sprinkle remaining Oreos on the surface and gently press to flatten the surface.
4. Refrigerate for 4 hours or overnight until set. Cut and serve!
Lotsa Oreos!


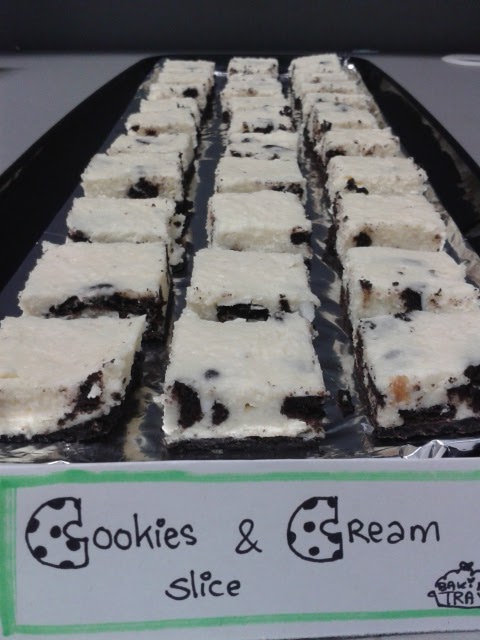
looks like cookies and cream cheesecake xD

Hope you enjoy these super sweet and crazy recipes!!! Especially the bacon one! hehe.. can't wait to see what my next flavour combination will be!!

Wednesday, March 26, 2014

Work Catering #39: have a break! Have a KitKat .. cheesecake!

Sorry... another cheesecake post! But this one is different!! it's got KITKAT bars in it XD I have made a similar cheesecake using Tim Tams.. and Cherry Ripes. Any other suggestions for chocolate bars? =P

Also made some blueberry cookies. I always enjoy putting fruit into cookies but usually I used dried fruit however this time I tried out fresh fruit! Enjoy the recipes :D

KIT KAT Cheesecake Slice
Recipe adapted from Bakers Corner
Ingredients
250g plain chocolate biscuits
100g unsalted butter, melted
375g cream cheese, softened
1 can (395g) sweetened condensed milk
1/2 cup (125ml) thickened cream
2 tsp powdered gelatine
1 1/2 tbs boiling water
1 tsp vanilla essence
180g Kit Kat, coarsely chopped
45g Kit Kat, extra, coarsely chopped

1. Line a 20x30cm pan with foil.
2. Process/Crush chocolate biscuits until fine. Add butter and process until well combined. Press mixture firmly over the base of prepared pan. Refrigerate while making filling.
3. Beat cream cheese with electric mixer until smooth. Beat in condensed milk and cream until well combined. Dissolve gelatine in water, then add to cream cheese mix. Beat in vanilla then fold in chopped Kit Kat pieces.
4. Carefully pour mixture into prepared base. Sprinkle with extra Kit Kat pieces and refrigerate for 4 hours or overnight. Cut in squares and serve.

Look at the Kit Kat chunks!! XD
Brown Sugar Blueberry Cookies
Recipe adapted from The Baker Upstairs

Ingredients
113g butter, softened at room temperature
3/4 cup packed brown sugar
1 egg
1 tsp vanilla essence
1 3/4 cups plain flour
1/4 tsp salt
1/2 tsp baking powder
1 1/2 tsp cinnamon
1 tbs milk
3/4 cup fresh blueberries (I used frozen)

1. Preheat oven to 190oC. Line 2 baking trays with baking paper.
2. Beat butter and sugar with an electric mixer until smooth. Add egg and vanilla and mix well to combine.
3. Stir in flour, baking powder, salt and cinnamon with mixer on low speed. Mix until dough comes together then add milk. If dough still dry and crumbly, add 1 tbs milk at a time until it comes together.
4. Carefully fold in blueberries. Refrigerate for 30 minutes.
5. Remove dough from fridge. Roll teaspoonful of dough and place on baking tray. Bake for 10-12 minutes or until golden.

I'm not sure if it was because I used frozen blueberries, but the cookies were a bit soft. I think the moisture from the frozen blueberries may have softened the cookies after they were baked however the flavours were still there. It actually tasted like cookie dough so I didn't mind ^^ The cinnamon, brown sugar and blueberry went really well together.
Cookie time!

Wednesday, March 19, 2014

Work Catering #38: So CHEESECAKEY!!

If you have been reading my blog, you will know that I LOVEEEE CHEESECAKE!!! It's the one cake that I could live off if I was ever stuck on a deserted island... and I wouldn't be sick of it XD There are just SOOO many different cheesecakes out there! Baked.. frozen...chocolate.. fruity... mini... slice...  the list goes on!
So for catering this week I decided to bake a classic carrot cake with a twist. Surprisingly I have not made carrot cake before! (GASP! I KNOW!) It's such a classic and I love the cream cheese frosting (MY FAVOURITE FROSTING!) so I discovered this recipe that combined carrot cake with cheesecake - a twist on the original cream cheese frosting. The base is carrot cake, while the topping is baked cheesecake. This slice is best served chilled so try and be patient and chill in fridge before eating ^^ if you can...
ok i know.. uneven layers >_>
Carrot cake cheesecake slice
Recipe adapted from The Sweets Life

Ingredients
Carrot Cake
1/2 cup brown sugar
1/2 cup caster sugar
1 1/2 cups plain flour
1 tsp baking powder
1/2 tsp bicarb soda
1/2 tsp salt
2 tsp ground cinnamon
1/4 tsp ground allspice
1/4 tsp ground nutmeg
2 tsp vanilla essence
1/3 cup chopped pecans
1/3 cup shredded coconut
1/3 raisins
1 1/2 cups grated carrot (about 2 large carrots)
1 large egg
1/2 cup vegetable oil

Cheesecake
500g cream cheese, softened
1 can (395g) sweetened condensed milk
1/4 cup sour cream
pinch of salt
1/2 tsp vanilla essence
2 large eggs

1. Preheat oven to 180oC and line rectangular baking pan (20x30cm) with baking paper.
2. Beat all carrot cake ingredients in a large bowl with an electric mixture until a thick dough forms (a stand mixer is great for this). Press dough into prepared pan, spreading an even layer. Set aside while you prepare filling.
3. In a separate bowl, beat cream cheese with electric mixer until fluffy. Beat in condensed milk until smooth. Make sure to scrape down sides of bowl. Add sour cream, salt, vanilla and eggs. Mix until combined.
4. Pour cheesecake mixture over the carrot cake base, spreading evenly. Bake for 20-25 minutes, or until just set. The centre should have a slight wobble.
5. Allow to cool completely before covering and refrigerating until bars are set, for 2-3 hours or best overnight. Cut into squares and serve chilled.

Was def a winner at work! they loved it :D
One bite is not really enough...
Next up are these cute little choc cheesecake cups! The smaller the dessert.. the more you can eat right? XD These are just the right size and no bake! You could make them in larger cups or even a cake tin, just double the recipe.

Chocolate Cheesecake cups
Recipe adapted from DK learns to cook
Ingredients
Base
250g Nice biscuits
100g butter, melted
4 tbs cocoa powder

Filling
250g cream cheese, softened at room temperature
1/4 cup icing sugar
1/2 tsp vanilla essence
150g dark chocolate
150g thickened cream

1/4 cup milo

1. Process/Crush biscuits with cocoa powder until fine. Add melted butter and mix well. Press 1/2 tsp into base of small cups.
2. Beat thickened cream until soft peaks form and refrigerate. Melt chocolate in microwave and allow to cool.
3. Beat cream cheese until smooth. Add in icing sugar and vanilla and beat until combined.
4. Mix melted chocolate into cream cheese mixture until combined.
5. Mix 1/3 of cream into mixture. Add remaining cream and fold until no white streaks remain.
6. Carefully spoon cream cheese mixture into cups. Dust with milo and refrigerate for at least 8 hours before serving. 
Lots of mini cups! mmm

dont forget the spoons! hehe

Looks like chocolate mousse yeah?
So get out there!! Make some cheesecake!! :D I'm sure I'll have many more cheesecake recipes to come! But here's some you can check out :)
 http://traybakingtray.blogspot.com.au/2013/03/work-catering-14-peaches-and-cookies.html
 http://traybakingtray.blogspot.com.au/2014/02/mini-blueberry-cheesecakes.html