Friday, November 15, 2013

Work Catering #36: White chocolate and raspberry cheesecake slice and cookies

I couldn't think of a creative title! haha! Nice to get back into some cheesecake =D I realised that Scotch finger biscuits taste really good for a cheesecake base =) maybe because they are so buttery.. hehe! I liked this cheesecake BUT.. the only problem was the topping :( it was supposed to be a marbled raspberry topping... but kinda ended up being a messy splodge =___= oh wells! still tasted yummy! hehe

White chocolate and raspberry cheesecake slice
Recipe adapted from Taste.com.au
Ingredients
250g packet Arnott's Scotch Finger biscuits
100g butter, melted
2 tbs boiling water
3 tsp powdered gelatine
375g cream cheese, at room temperature
1/4 cup (55g) caster sugar
300ml thickened cream
1 tsp vanilla essence
180g white chocolate, melted and cooled

Raspberry topping
1 tbs boiling water
1 tsp powdered gelatine
200g frozen raspberries, thawed

1. Line base of 20x30cm slice pan with foil or baking paper.
2. Process biscuits and butter in food processor until mixture resembles fine breadcrumbs. Use back of spoon to press biscuit mixture over base of pan. Refrigerate for 30 minutes.
3. Beat cream cheese and sugar in bowl until smooth. Add cream, vanilla essence and chocolate and beat until well combined.
4. Dissolve gelatine in boiling water in small bowl. Allow to cool for 5 minutes before adding to cream cheese mix. Pour cheesecake mixture into prepared pan and smooth the surface.
5. To make topping, blend/process raspberries until smooth. (I had to add a bit of water to get it to a smooth puree). Dissolve gelatine in small bowl in boiling water then mix into raspberry puree.
6. Spoon raspberry mixture over cheesecake. Use a skewer to create a swirled effect. Place in fridge for 3 hours or until set. Cut into small pieces to serve.
see? not very pretty..

Looks a bit artificially red here..
I also made these cookies also knows as "Crisps".. not sure why though! haha I would personally call them chocolate crackled cookies ^^ They were of a chewy texture and very simple to make!

Chocolate Lace Crisps
Recipe adapted from The Organised Housewife
Ingredients
100g dark chocolate melts
80g unsalted butter
1 cup caster sugar
1 egg
1 cup plain flour
2 tbs cocoa powder
1/4 tsp bicarb soda
1/4 cup pure icing sugar

1. Preheat oven to 160oC and line 2 baking trays with baking paper.
2. Place chocolate and butter in small saucepan and melt over low heat.
3. In a separate bowl, combine sugar, egg, flour, bicarb soda and cocoa.
4. Pour in chocolate mix and stir to combine. Cover and refrigerate for 15 minutes.
5. Roll teaspoonsful of dough into balls and roll in icing sugar. 
balls rolled in icing sugar

Place on baking trays (allowing room for them to spread) and bake for 15 minutes.
Baking in the oven. Allow room for spreading~

Nice and crackly!


with sprinkles of icing sugar =)

Thursday, November 7, 2013

Work Catering #35: Tim Tam Balls!!!!! and sticky date!

Yes that's right! First came the Oreo Cheesecake Balls... and now it's Tim Tam Balls!!! My friend showed me this recipe and my first thought was "Only 3 ingredients! Only 3 steps!" (so lazyyyy =_=") but so delicious!! Actually, don't know why I didn't think of it earlier. If you can use Oreos, there are thousands of other biscuits you can use! Just process them, mix them with cream cheese, roll them into balls and TA DA!!!

Anyways, decided to make them a little more fancy by coating them in white chocolate and giving them a sprinkle of MILO ^^

Tim Tam Balls
Recipe adapted from Favourite Food Recipes
Ingredients
1 packet Tim Tams (250g)
250g block cream cheese, softened at room temperature
300g cooking chocolate (milk, dark or white.. it's up to you!), melted

1. Crush/Process Tim Tams. Add cream cheese and mix together until combined.
2. Roll into balls (1 tsp of mix). Refrigerate for 10 minutes.
3. Coat with melted chocolate and refrigerate until set.


coated in smooth white choc~~and a sprinkle of MILO~
inside... Tim Tam deliciousness!!!
I've also been wanting to make sticky date pudding - it's also one of those classic bakes but it seemed to always go down the list because I get distracted with cheesecakes or.. Tim Tam balls!!! hahha! anyways had some sticky date pudding at work the other day and it was sooooo good! So good that it gave me the motivation to make it :D the butterscotch sauce is definitely worth making!!!

Sticky Date Pudding with Butterscotch Sauce
Recipe adapted from Citrus and Candy

Ingredients
250g pitted dates, chopped
1 tsp bicarbonate soda
1 1/2 cups (375ml) boiling water
160g unsalted butter, softened at room temperature
1 cup packed brown sugar
1 tsp vanilla essence
2 eggs
2 cups self raising flour

Butterscotch Sauce
1/2 cup brown sugar
150ml thickened cream
1/2 tsp vanilla essence
30g butter

1. Preheat oven to 180oC. Grease and line rectangle baking tin (20x30cm) with baking paper.
2. Place dates and bicarb soda in a bowl. Pour over boiling water and stand for 20 minutes.
3. In a separate bowl, cream the butter, sugar and vanilla together until light and fluffy. Add the eggs one at time, beating well after each addition.
4. Fold through the date mixture (including the water) and flour until well combined. (The mixture may look really wet and watery but it'll work!)
5. Spoon the mix into baking tin and bake for 30-35 minutes or until skewer comes out clean. Cool in tin for 5 minutes before cooling on wire rack.
6. Make the butterscotch sauce but combining all ingredients into a medium saucepan. Bring to a boil over medium heat, constantly stirring. When boiled, reduce heat to low an simmer for a few minutes until darkened and thickened.
7. To serve, prick warm cake all over with skewer and pour a third of the butterscotch sauce over the cake. Allow to soak through for 10 minutes. Cut into square pieces and spoon extra sauce to serve.
More like sticky date cake slab! haha
Lil sticky squares ^^
With a chopped date on top :D all for presentation~

Sunday, November 3, 2013

Salted Caramel Cupcakes

 
Another belated post! hehe~I had some leftover salted caramel from my salted caramel swiss roll bake so decided to use it in some cupcakes! I really like the recipe I have for plain cupcakes because it means I can add whatever flavour to it! I was trying to decorate them nicely... but failed -___-" ended up just spreading the icing and drizzling leftover salted caramel on top :)
Salted Caramel Cupcakes
Recipe modified from Vanilla cupcakes

Ingredients
125g butter, softened
3/4 cup caster sugar
2 tsp vanilla essence
2 eggs
1 1/2 cups self-raising flour
1/2 cup milk
1/2 cup caramel chocolate chips

Salted buttercream frosting
2 tbs butter, softened
1/2 cup icing sugar
2 tbs salted caramel + extra

1. Preheat oven to 190oC and line a 12 hole muffin pan with cupcake cases.
2. Cream butter, sugar and vanilla with electric mixer until pale.
3. Beat in eggs one and a time, beating well after each addition.
4. Sift over flour and mix until almost combined. Stir in milk.
5. Fold in caramel chocolate chips and spoon into muffin holes. Bake for 15 minutes or until skewer inserted into the centre comes out clean.Once cooked, removed from oven and allow to cool.
6. Meanwhile make frosting by placing all ingredients in small bowl. Beat using electric mixer until it all comes together to form frosting consistency. If you find it's too runny, add more icing sugar... if you find it too dry add more butter:)
7. Ice cooled cupcakes and drizzle with extra salted caramel.

The cupcakes were light and fluffy and the caramel chocolate chips really went well with the whole salted caramel theme :) Gave a few away to friends and they liked them too :D hmmm... I wonder what other flavours I can make ^^

Thursday, October 31, 2013

Work catering #34: Gluten free bake!

I received a few mini recipe books in the mail from CSR (yes the sugar brand!) because they were free!! Gotta love freebies XD anyways one of them was full of GLUTEN FREE recipes ^^ I've always wanted to bake gluten free desserts but... I was a little scared~ I mean, what happens if the utensils I use have residues of gluten then I use them to bake... then.. it wouldn't be gluten free would it?

hahha.. ok maybe I think too much ^_^" Anyways.... so here are the recipes =)
Raspberry Jam Slice
Recipe adapted from "Gluten Free Delights" by CSR

Ingredients
Base
1 cup (150g) almond meal
1/2 cup (45g) fine desiccated coconut
1 cup (150g) gluten free plain flour
1 1/4 cups (275g) Raw Caster sugar (I actually didn't like the little "crunchy" raw bits of the sugar so I think next time I will just use regular caster sugar and probably bring it down to 1 cup)
1/2 cup (125g) unsalted butter, melted
2 egg yolks
1 tsp cold water

Filling
3/4 cup raspberry jam
1/2 cup frozen raspberries

Topping
2 egg whites, lightly beaten
2 1/2 cups (215g) shredded coconut
1/3 cup (50g) soft icing sugar

1. Preheat oven to 170oC (150oC fan forced). Grease and line 20x30cm baking tray with baking paper.
2. Base: combine all dry ingredients in a large bowl. Mix the butter, yolks and water in separate small bowl. Add wet ingredients to dry ingredients and mix until well combined. [OR.... you can just put everything in a food processor if you own one ^^]. Press into tray and bake for 20 minutes or until gold brown. Allow to cool.
3. Filling: Spread jam over base then sprinkle on raspberries.
4. Topping: Combine egg whites, shredded coconut and icing sugar and mix until combined. Spread over jam and bake for 30-35 minutes or until golden.
5. Cool in pan and cut into slices.
I found the slice to be quite sweet... So that's why I suggested reducing the amount of sugar. The crunchy coconut topping was nice though :) Oh this is what it looked like in the book.

And this is what mine looked like =p

Love the redness of the jam!

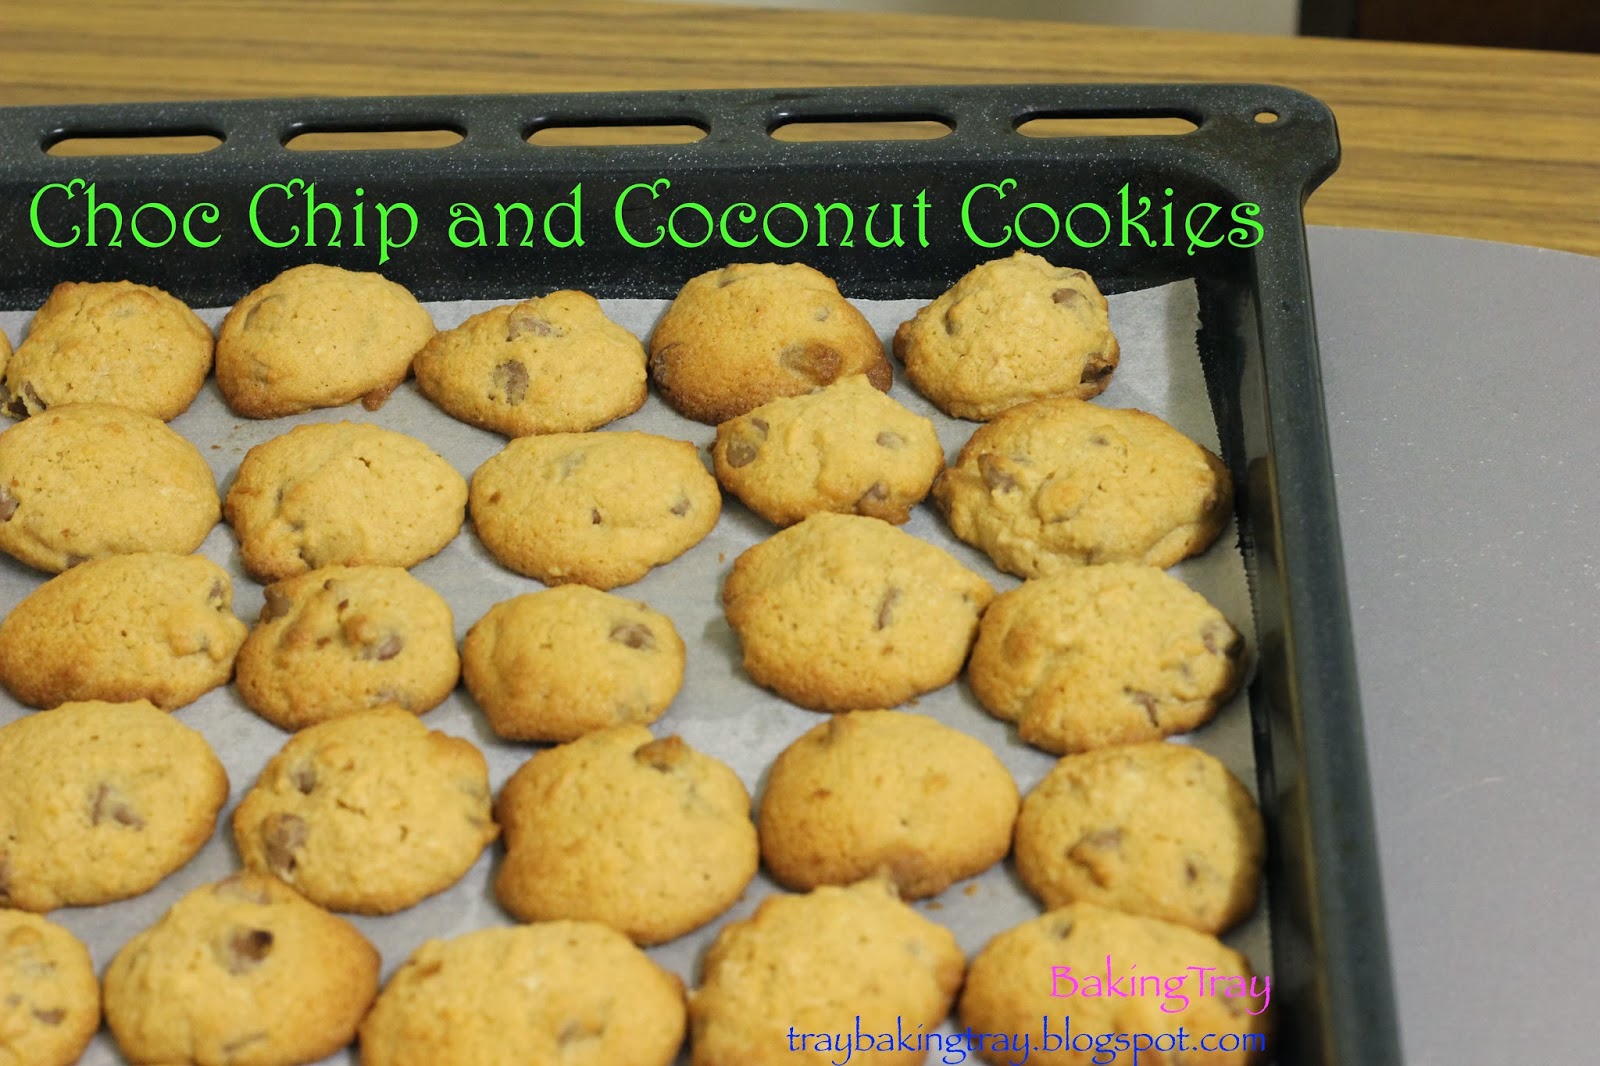
Gluten Free Choc chip and coconut cookies
Recipe adapted from "Gluten Free Delights" by CSR

Ingredients
3/4 cup (185g) unsalted butter, softened at room temp
1 1/4 cup (200g) brown sugar
2 large egs
1 1/2 cups (225g) gluten free plain flour
1 tsp baking powder
1 1/2 cups (130g) desiccated coconut
1/2 cup (75g) almond meal
230g dark chocolate chips

1. Preheat oven to 200oC (180oC fan forced) and line 3 baking trays with baking paper.
2. Beat butter and sugar until pale and creamy. Add eggs one at a time, beating well after each addition.
3. Sift flour and baking powder together and add to mixture along with coconut, almond meal and choc chips. Mix until well combined. (If you find the mixture is quite wet and runny like I did, add a little more flour)
4. Place teaspoons (or tablespoons if you want bigger ones) of cookie dough onto baking trays, allowing room for the cookies to expand. Bake for 12-15 minutes or until golden.

I had a little trouble with the texture of these cookies because the dough was a bit wet so I added in a little more flour to get the consistency I was after. These cookies are the soft cakey type but the coconut really gives it a different texture and taste. This is what it looked like in the book..

Mine were a little different... haha

Anyways as it is still October, I would like to submit this to Aspiring Baker's #36: Choc-a-cookie (October 2013) hosted by Genie of Honeybee916food.

Wednesday, October 23, 2013

TART time: Mini mixed berry tarts

No blog about work catering this week because it was being covered by a REAL caterer! haha! So thought I'd blog about these tarts I made last week =) My friend had given me these egg tart tins all the way from Hong Kong especially for making Cantonese egg tarts. But after that bake, I hadn't used them at all >___<" so time to get them out again for some tart baking! =D 

Mixed Berry Tarts

Recipe adapted from Melbourne Dinning

Ingredients
Pastry
125g unsalted butter, melted
90g caster sugar
175g plain flour 
pinch of salt
3 tbs almond meal

Filling
170ml thickened cream
2 eggs, lightly beaten
2 tsp vanilla essence
1/4 cup caster sugar
3 tbs plain flour
1 cup mixed frozen berries

1. Preheat oven to 180oC and grease mini tart tins (I used 10 egg tart tins and 2 mini tart tins).
2. To make pastry, stir together warm melted butter and sugar. Add flour and salt and stir until soft dough is formed.
3. Press dough evenly into the tart tins, including the base and sides of tin. Place tart tins on baking tray and bake for 10-15 minutes or until light golden in colour. Remove tart cases out of oven and sprinkle each tart case with almond meal. Turn down the oven to 160oC.
Baked tart cases
4. For the filling, whisk cream, eggs, vanilla essence and sugar together. Add flour and whisk until well mixed. Transfer mix to a jug for easy pouring.
5. Place a few frozen mixed berries in each tart case. Pour custard filling even over the berries, careful not to overfill each tart.
6. Place tarts back into the oven and bake for a further 20-30 minutes. Tarts are done when custard filling is firm. Leave to cool and then remove from tart tins. Dust with icing sugar before serving.

I really loved the crust of these tarts! They were sweet, crispy and best of all super easy to make and mould in the tins! They are best eaten on the day of baking because the crust goes a bit soft the next day.... anyways ENJOY =D
Yummy tarts =D =D

Sunday, October 20, 2013

Work Catering #33: Egg free bake

 
I must have subconsciously picked these recipes for work catering because the speaker at the talk is allergic to eggs and both recipes are EGG FREE!!! hehe! First up are these cheesecake cookies! yum! Found the recipe while looking for interesting chocolate chip cookies for this month's Aspiring Baker's challenge.


Egg free Chocolate Chip Cheesecake Cookies
Recipe adapted from InspiredMe
Ingredients
250g cream cheese, softened at room temperature
1/2 cup (113g) butter, softened at room temperature
3/4 cup caster sugar
1/2 tsp salt
1 tsp vanilla essence
1 cup plain flour
3/4 cup
30g dark chocolate, melted (optional)
30g white chocolate melted (optional)

1. Preheat oven to 180oC. Line 2 baking trays with baking paper.
2. Beat cream cheese, butter, salt, sugar together with electric mixer until creamy. Add vanilla and beat to combine. Add flour and mix with wooden spoon until dough forms. Stir in chocolate chips.
3. Roll teaspoon full of dough into ball. Place on tray and press slightly with back of spoon or palm of hand. Bake for 15-20 minutes or until light golden brown. Allow to cool before transferring to wire rack.
4. To decorate, place melted dark chocolate into piping bag (or small sandwich bag with the tip cut off) and pipe squiggles over the top.

So...I am submitting this to Aspiring Bakers #36: Choc-a-cookie (October 2013) hosted by Genie of Honeybee916food.

Next up is Mars Bar slice inspired by my cousin... although I don't think this is the one she was talking about because this doesn't use as much butter as she described.. oh wells! still yummy :D 

Mars Bar Slice
Recipe adapted from Julia from Boredom Abounds
Ingredients
70g butter
1 tbs golden syrup
4 x 53g Mars Bars, chopped up
3 cups rice bubbles
250g milk or dark chocolate, melted

1. Place butter, golden syrup and chopped Mars bars in saucepan over medium heat. Stir until all melted then remove from heat.
2. Stir in rice bubbles until well combined. Spoon mix into prepared 20 x 30cm baking tray lined with foil. Press down using back of large spoon and refrigerate for 30 minutes.
3. Pour melted chocolate over the top of slice and spread evenly. Refrigerate again for an hour or until set and slice into squares to serve.

I have to say this slice is SUPER SWEET!! But I guess if you love Mars Bars then you will love this slice. This could even be a great base for a cheesecake! Hmmm.. *ideas churning... hehe*

Sunday, October 13, 2013

Work catering #32: Fusion baking! Chocolate chip cookie + Cheesecake = Cheesecake chocolate chip cookie slice!

Here's a simple maths equation for you.
Chocolate chip cookies + Cheesecake = ????

It's simple! Cheesecake Chocolate chip cookie slice =D One of the best inventions ever ^___^" Fusion of two delicious sweets!!! The cheesecake layer is supposed to be sandwiched in between the two layers of chocolate chip cookie but I think my ratios were a bit odd.. Still delicious though :D

Cheesecake Chocolate chip cookie Slice
Recipe adapted from Choc Chip Uru of GoBakeYourself

Ingredients

Cookie
1 cup (225g) butter
1 1/2 cups brown sugar
2 tsp vanilla essence
1 tbs milk
3/4 tsp salt
1 egg
1 tsp baking powder
2 cups plain flour
1 cup chocolate chips

Cheesecake
250g cream cheese, softened at room temperature
1/2 cup caster sugar
1 egg
1/2 tsp vanilla essence

1. Preheat oven to 170oC. Grease and line 20x30cm baking tray with baking paper.
2. Melt butter in saucepan and stir in sugar and essence. Initially it will stay separated but keep mixing until combined and there is no more floating butter. Allow to cool.
3. Beat in egg and milk.
4. Stir through the flour, salt and baking powder until just combined. Fold through chocolate chips.
5. Spread half of the batter into the base of prepared pan into a even layer. Refrigerate this layer and remaining dough until needed.
6. Beat cream cheese and caster sugar in a bowl until pale and fluffy. Beat in the egg and vanilla essence until mixture is smooth.
7. Pour mixture over the top of cookie layer.
8. Make flat disks with remaining cookie dough with your hand and gently press on top of cheesecake batter. not all the batter must be and won't be covered but try your best ^^
9. Bake for 30-35 minutes or until golden brown. Let cool completely to room temperature then refrigerate. Cut into squares and serve!
Looks like mishaped cookies XD
Cheesecake choc chip cookie squares!
weird colour....
Also with the warmer weather last week I decided to bake something summery. Haven't baked a bundt cake in a while so time to get out the bundt tin for this cake!

Mixed berry bundt cake
Recipe adapted from The way the cookie crumbles

Ingredients
Cake
2½ cups plain flour
2 teaspoons baking powder
225g unsalted butter, at room temperature
zest of 1 lemon
juice of 1 lemon
1 tsp salt
1¾ cups caster sugar
3 large eggs, room temperature
½ teaspoon vanilla essence
¾ cup buttermilk, room temperature (I didn't have any so used thickened cream instead)
2 cups mixed berries, frozen or fresh

Glaze
1½ cups icing sugar
juice of 1 lemon
1 tablespoon unsalted butter, very soft
Dripping glaze....
1. Preheat oven to 180oC and grease bundt tin.

2. Beat the butter, lemon zest, salt, and sugar with electric mixer until light and creamy.
3, Beat in eggs one at a time until incorporated. Add vanilla.
4. Fold in flour, baking powder and buttermilk (or cream) alternately, mixing just until incorporated.
5. Carefully fold in the berries and mix until combined. Transfer batter to prepared bundt tin smoothing the top.
6. Bake for 50-60 minutes or until skewer inserted in the center comes out clean. Transfer to wire rack to cool.
7. For the glaze, combine sugar, lemon juice and butter in small bowl. Whisk until smooth. Remove cake from oven and spoon oven cooled cake.
love the pop of the berries =D