Showing posts with label cake. Show all posts

Tuesday, April 17, 2018

The Journey to Perfecting Japanese Cheesecake

Hello All!

I can't believe its already 2018! Sorry for the inconsistent blog posts...

but here's another! XD

If you have been following my blog you would know I've had had few struggles with baking Japanese Cheesecake. They would either not rise, have cracks or just look ugly!

My friend introduced me to a recipe and it's been AWESOME! I have baked this a number of times and each time the cake has been light and fluffy! So just wanted to share the recipe with you all. I'm still working out how to minimise the cracks on top but nothing that a bit of icing sugar doesn't fix =p

You can find the original recipe by Craft Passion here. They have really good tips for what ingredients and equipment to use. They also have a handy video!

Hope you give it a go :D


Japanese Cheesecake
 
Recipe adapted from Craft Passion

Ingredients

Cream cheese batter
250g block cream cheese, cut into cubes
6 egg yolks
70g caster sugar
60g unsalted butter
100ml milk
1 tbs lemon juice
2 tsp lemon zest
60g cake flour (I replaced this with 50g plain flour + 10g corn flour)
20g corn flour
1/4 tsp salt

Meringue
6 egg whites
1/4 tsp cream of tartar (I didn't have this so replaced with the same of lemon juice)
70g caster sugar

1. Pre-heat oven to 200oC (Although the original recipe says no fan force... I don't have that option! Still turned out ok).
2. Grease 20cm x 8cm round cake pan with butter, line bottom with baking paper. (It is best to use a one piece cake tin i.e. one that the bottom does not come out)
3. To make cream cheese batter, whisk cream cheese until melted and smooth over a warm water bath.
4. Add egg yolks and whisk.
5. Add sugar and whisk.
6. Warm milk and butter in microwave/stove and fold into mixture.
7. Add salt, lemon juice, lemon zest and whisk.
8. Remove from water bath, sift in cake flour and corn starch. Fold into mixture.
9. Whisk egg whites in a separate bowl at low speed until foamy.
10. Add cream of tartar (or lemon juice) and beat at high speed till bubbles become very small but still visible.
11. Gradually add the caster sugar and beat till soft peaks.
12. Fold whites into batter a third at a time.
13. Pour into cake pan (make sure to leave around 2cm from the rim) and tap the pan on the counter to release air bubbles.
14. Place a tea towel in a large roasting tin then place cake pan on top (to protect bottom of cake pan from direct heat). Form water bath by pouring hot water into roasting tin (~1.5cm high) and place into oven.
15. Bake for 18 minutes then lower temperature to 140 degrees and bake for further 30 minutes. Turn off oven and leave cake in the closed oven for another 30 minutes. Remove water bath but leave cake in the oven with the oven slightly open for another 30 minutes to cool.
16. Unmold cake. Allow to cook before placing in fridge.
17. Decorate cooled cake by dusting icing sugar on top.

look at that height!!
light and flufffyyy

Sunday, February 16, 2014

Birthday Bake: Coffee and crumbs!!

Another birthday bake! This time for a work friend. Last time I made her a chocolate cake because she loves chocolate ^^ but this year I wanted to do something a little different. I know she also likes coffee so was looking up recipes for coffee flavoured cakes but came across this super crumb coffee cake! I only realised as I was making it that it did not involve coffee at all. It was named in this way so you can eat it whilst sipping nice cup of coffee~ I just loved the crumb on this cake.. it really was SUPER CRUMB! YUM!
Ok so it's not the prettiest cake in the world but nice, sweet and moist cake with super crummy and sugary crumb ^_^

Super Crumb Coffee Cake
Recipe adapted from Sallys baking addiction

Ingredients
2 cups plain flour
1 cup caster sugar
1 tsp salt
140g unsalted butter, softened
1 tsp baking powder
1/2 tsp bicarb soda
3/4 cup buttermilk (I just used just under 3/4 milk + 1 tbs white vinegar and left it for 5 min at room temperature)
1 large egg
2 tsp vanilla essence
2/3 cup brown sugar
2 tsp ground cinnamon

1. Preheat oven to 180oC. Grease and line 20cm round cake tin.
2. Whisk flour, caster sugar and salt together in large mixing bowl to combine. Mix in the butter with a fork until mixture resembles course crumbs. Set aside 1 cup of flour mixture.
3. Add baking powder and bicarb soda into the remaining flour mixture. Add buttermilk, egg and vanilla and mix until batter is smooth and fluffy. Pour the batter into prepared tin, smoothing the top.
4. Add brown sugar and cinnamon to reserved flour mixture. Sprinkle the crumbs over the batter, pressing lightly so they stick.
5. Bake for 45-50 minutes or until skewer inserted into the centre comes out clean. Allow to cool for 10 minutes then remove from tin.

Finished cake! not the neatest...
Deliciously moist :D

Sunday, December 15, 2013

Fairy Bread Cake

This cake brought me back to my primary school days... eating fairy bread at kid's parties!
I used a simple vanilla cake recipe for a nice light cake and finished with buttercream frosting and sprinkles for decoration. It's supposed to look like a giant piece of bread :D I got this idea from Raspberri cupcakes Giant fairy bread cake.

Fairy Bread Cake
Recipe adapted from All Recipes

Ingredients

Cake
1 cup caster sugar
125g butter
2 eggs
2 tsp vanilla essence
1 1/2 cups plain flour
1 3/4 tsp baking powder
1/2 cup milk

Buttercream frosting
40g unsalted butter, at room temperature
1/2 cup soft icing sugar
1 tbs milk

1. Preheat oven to 180oC and line a 23xcm square cake tin.
2. Cream together butter and sugar until light and fluffy. Beat in the eggs, one at a time, then stir in the vanilla essence.
3. Add flour and baking powder and mix well. Stir in milk until mixture is smooth. Pour into prepared pan.
4. Bake for 30-40 minutes or until skewer inserted into centre comes out clean. Remove from oven and allow to cool on wire rack.
5. For buttercream frosting, combine all ingredients in small bowl and beat with electric mixer until smooth. Spread icing onto cooled cake and decorate with coloured sprinkles.
Light, fluffy piece of cake =)

I brought this cake to work for a colleague's farewell because she said that she likes fairy bread ^_^" I'm glad she liked the cake~ it was nice and light =)

Tuesday, April 2, 2013

Long weekend baking =)

Don't you just love the long weekend? =D You can sleep in, go out on day trips or just stay at home and bake! (which is what I did a lot of ^^). I tried to make the most of the the time I had and decided to make bread (as that needs time to rise). I baked some savoury scrolls using the Cinnamon Scroll recipe but added different fillings - sweet chilli and ham and cheese & basil pesto and cheese.
savoury scrolls! Sweet chilli, ham and cheese & Basil pesto and cheese
Also with the bread theme, I baked some savoury croissants with freshly grown chives from the backyard ^_^
Savoury croissants filled with bacon, chives and cheese
But the recipe that I would like to share today is for this delicious Apple and Raspberry Crumble Cake. The original recipe was actually for Apple and Strawberry but I used raspberries instead (still a red berry ^^).
The cake is lovely, buttery and soft while the apple and raspberries give a good tang and to top it off, the crumble is crunchy and sweet! Just an irresistible cake! Was gone in 2 days! 

Apple and Raspberry Crumble Cake
Recipe adapted from taste.com.au

Ingredients
200g butter, at room temperature
155g (3/4 cup) caster sugar
2 tsp vanilla essence
2 eggs
150g (1 cup) self-raising flour
150g (1 cup) plain flour
185ml (3/4 cup) milk
1 Granny smith apple, peeled, cored, thickly sliced
100g raspberries, frozen or fresh

Crumble topping
75g (1/2 cup) plain flour
50g chilled butter, chopped
55g (1/4 cup, firmly packed) brown sugar

1. Preheat oven to 180oC. Grease and line a round 20cm springform pan.
2. Beat butter, sugar and vanilla with electric mixer until pale and creamy.
3. Add eggs one at a time, beating well after each addition. 
4. Fold in combined flour and milk with large metal spoon until well combined.
5. Spoon into prepared pan. Use the back of the spoon to smooth the surface. Arrange the apple and raspberries on top.
Apple and raspberries arranged on cake
6. For the crumble topping, place the flour and butter in a bowl. Using fingertips, rub butter into the flour until mixture resembles coarse breadcrumbs. Stir in the sugar.
7. Sprinkle the crumble topping over the apple and raspberries. 
8. Bake in oven for about 1 hour or until a skewer inserted into centre comes out clean. Leave in pan to cool before transferring to wire rack. 
YUMMMMYYYY! =D =D =D
Breakdown of the cake.
It's a good things I'm not on holidays everyday! Would be baking wayyyyy too much >< haha!


Monday, March 4, 2013

Baking without eggs!!

I received an order to bake a birthday cake for a friend's work mate. She suggested for me to bake a chocolate cake. "Easy" I thought.. until I heard that he was allergic to eggs... and potentially gluten intolerant.. and maybe milk intolerant... and maybe even allergic to nuts!! >_< Maybe this wouldn't be as easy as I thought and I wouldn't want to be responsible... just in case my cake causes an unwanted allergic response >_______<

But... thank God in the end it was just eggs he was allergic too =p

Was looking up recipes on the net and found this recipe for Eggless Chocolate Cake which seemed quite simple...

So if you have anyone that is allergic to eggs.. try this cake out! (it also doesn't contain milk... if you don't add the ganache.. or just make a chocolate glaze out of chocolate and butter; and don't add the nuts if they are allergic)... OR if you just don't have any eggs in the house =p no excuse for not baking!
Eggless Chocolate Cake
Recipe adapted from Tori Hawthorne

Ingredients
100g butter
3 tsp golden syrup
300ml boiling water
1 tbs vanilla essence
300g self raising flour
100g brown sugar
30g cocoa powder
1 tsp bicarb soda
50g walnut crumbs (for decoration)

Chocolate ganache icing
100g dark chocolate
80ml thickened cream

1. Preheat oven to 160oC. Grease and line 20cm round cake tin.
2. Place butter, syrup and vanilla into heavy bowl or saucepan. Add 300ml boiling water and whisk with fork to mix.
3. Sift flour, sugar, cocoa and bicarb soda into large bowl. Pour in the butter mixture  and whisk until you have a smooth batter.
4. Pour into prepared tin and bake for 45-55minutes until cake is risen and bouncy to touch (I advise to check at 40 minutes because my cake was done. You don't want it to be too dry).
5. Cool in tin for 15 minutes before turning out onto wire rack.
Cake cooked... cracked a little ><
Chocolate ganache icing
To make chocolate ganache icing, heat chocolate and cream in a bowl (double-boiler) until melted and well combined. Pour into smaller bowl and leave to cool at room temperature (it will thicken when cool). If not using for a while, place in the fridge.

Assembly
Cut cooled cake in 2 pieces. Spread half the ganache on the bottom half. Sprinkle with walnut crumbs. Place second layer on top and ice with chocolate ganache. 
Decorate as you like. I placed 2 chocolate macarons on top and sprinkled the border with walnut crumbs :)
Cake sliced, filled with chocolate ganache and walnut crumb
Finished cake =D
It's been really fun baking for others ^^ nearly feels like a real "business" hehe...

Thursday, February 28, 2013

Work catering #11: Something fruity and something custardy

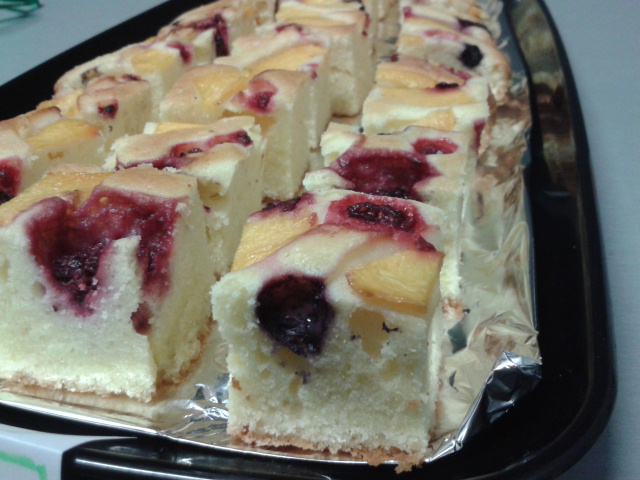
Since last week was all about chocolate, this week is a little lighter. Still had peaches at home so decided to make Fruit Pastry Cake! Haven't made this one in a while but you can find the recipe here.

Also on my "to-bake-list" was to try and make Vanilla slice. Walking past cafe's and bakeries, I've been getting some inspiration. This is a classic slice that I've always wanted to try and after looking  up a few recipes, it didn't seem too hard. I think the most difficult part that people have trouble with is the custard.... 


Which is where I got stuck too!!! I think I didn't cook it long enough for it to "thicken".. I was too scared I'd cook it too much that it would get 'lumpy'.. so I quickly took it off the stove. I kept on checking on it after every hour (felt like the contestants on Masterchef who keep opening the oven to see if their cake is cooked... but its like.. CLOSE THE OVEN!!! hahah now i know how they feel)...

Despite a more "runny" custard... the flavours were definitely there! so a recipe that i will definitely go back and repeat =)

This recipe is from Donna Hay who is quite a famous chef in Australia. She presents her food really well! I love looking through all her food recipes!

Vanilla slice
Recipe adapted from Donna Hay

Ingredients

3 sheets puff pastry, thawed
Icing sugar for dusting

Vanilla custard/cream
375ml (1 1/2 cups) milk
375ml (1 1/2 cups) single cream (I used thickened cream)
60g butter
2 tsp vanilla essence
150g (2/3 cup) caster sugar
1/3 cup cornflour
125ml (1/2 cup) water
6 egg yolks

1. Preheat oven to 180oC. Place puff pastry on lined baking tray. Prick with fork and bake for 8-10 minutes until golden. Cool and flatten if neccessary.
2. For custard, place milk, cream, butter, vanilla and sugar in saucepan ove medium-low heat and cook until hot but not boiling.
3. Mix the cornflour and water to a smooth paste and whisk into hot milk mixture.
4. Add the egg yolks and stir, allowing to simmer for 6 minutes or until mixture has thickened. Remove from heat and allow to cool at room temperature.
5. Place 1 1/2 pastry sheets in 20cm x 30cm baking pan lined with baking paper. Spread filling and top with remaining pastry sheets.
6. Refrigerate for 2 hours or until set. To serve, dust with icing sugar and slice.

A bit of a mess ><

But still sliceable :)


My fruit pastry cake with peaches and mixed berries

These served a lot better
Sides a bit more coloured than center...
Another close up of the cake~

Monday, October 1, 2012

Calculator cake! - for all those accountants out there~

Here's another post to add to the decorated cake collection! My friend made this calculator cake for her friend's birthday! 
Birthday Calculator cake~
She used white and black fondant icing and mixed the two to get a grey colour. So much detail gone into the decorating! Each of the buttons and the labels. Fondant icing looks so fun to play with =D And it's such a creative idea! So just thought I'd share it :)
CASIO brand ^^

Sunday, June 3, 2012

Inventive bake: Cakies n' Cream!!!! with special guest *MANDA*

One of my good friends, Amanda, came to Melbourne for a week for work experience and so I'm very happy to have her as a special guest on BAKINGTRAY =D!! We decided to bake one Friday night but didn't really have a recipe in mind, just a lot of packets of oreos and a leftover bottle of cream!! And so begins the start of our inventive bake!
I originally wanted to bake oreo cheesecake but we forgot to buy cream cheese =___=... so we decided to create our own cake! Here are the different layers:
  1. Crushed Oreo biscuit layer
  2. Nutella
  3. Chocolate sponge
  4. Whipped cream
  5. Oreo biscut (whole)
  6. Whipped cream
  7. Chocolate sponge
  8. Chocolate buttercream


It was pretty fun trying to think up the different layers as we went ^__^ and I'm glad they all turned out really well! So if you want to try it out.. here's the recipe!! Or you can use different elements of our cake and make up your own!
CAKIES AND CREAM - btw have to thank Annie for the inventive name =D we couldn't think of what to call it.. Chocoreo? Triple choc oreo cake? hehe.. but Cakies and Cream suited JUST FINE :D


The different steps in making this layered cake ^^

A. Oreo biscuit layer
Ingredients
1 packet Oreo biscuits
3 tbs butter, melted
1. Crush oreo biscuits finely using a food processor (or manually if you like). 
2. Add melted butter and mix. Spoon mixture into base of lined cake tin, pressing down firmly with the back of the spoon.


B. Chocolate sponge 
~Makes 1 20x30cm sponge 
Ingredients
3 Eggs
1/2 cup caster sugar
1/4 cup plain flour
1/4 cup self raising flour
2 tbs cocoa powder


1. Preheat oven to 180oC. Line rectangle cake tin.
2. Beat eggs with electric beater until thick and creamy, gradually beat in sugar.
3. Triple-sift dry ingredients and gently fold into egg and sugar mix.
4. Bake for 25 minutes.


C. Whipped cream
1. Whisk thickening cream with a teaspoon of caster sugar until soft peaks form.


D. Chocolate buttercream
Ingredients
I hate to admit it.. but we used a packet mix ><" haha but you can make your own buttercream by beating 125g butter, 1 1/2 cups icing sugar, 3 tbs cocoa powder and 1-2 tbs milk :)


CAKE ASSEMBLY!!
1. Press down crushed oreo biscuit layer into cake tin and refrigerate for 1 hour.
2. Spread a layer of nutella onto biscuit layer.
3. Bake chocolate sponge. Cut 2 pieces of sponge that will fit into cake tin. Lay one sponge on top of nutella.
4. Spread a layer of whipped cream. Layer whole oreo biscuits and top with another layer of whipped cream.
5. Add final layer of chocolate sponge.
6. Ice with chocolate buttercream icing. Cover with cling wrap and refrigerate overnight.


side view of cake~
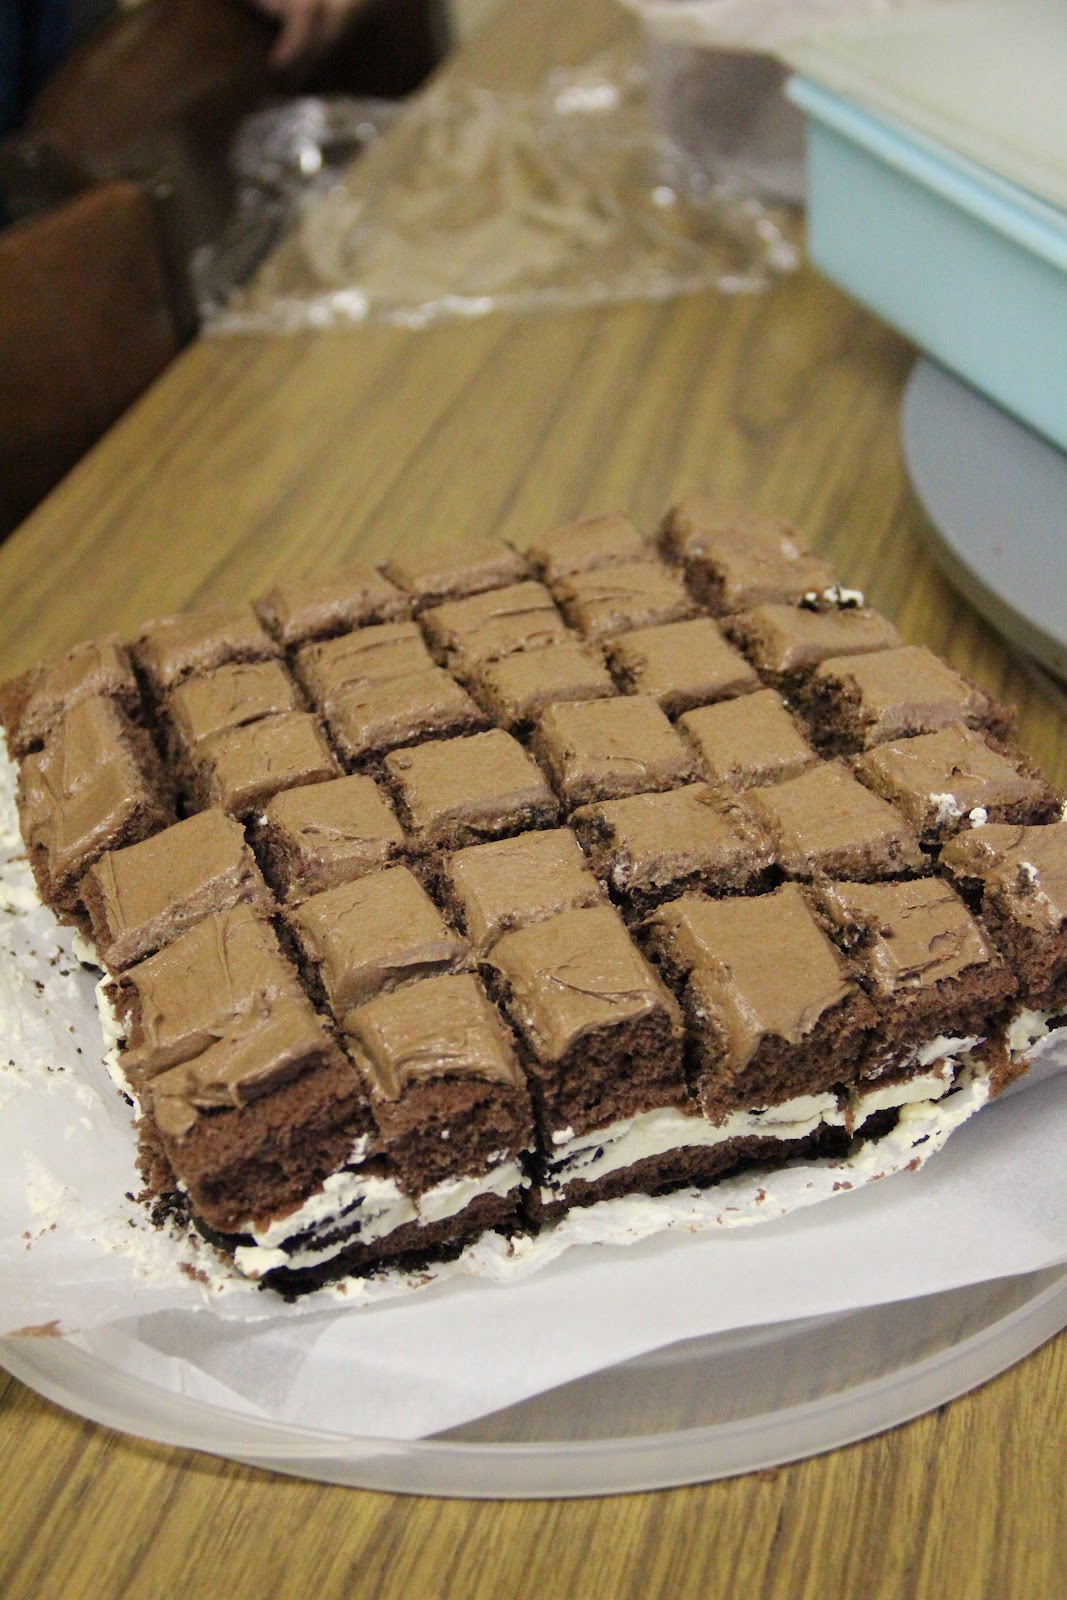
slicing straight down the middle!! love all the layers ^__^
cutting up the cake!! YUMMY =D
Was indeed such a FUN BAKE =D so THANKS AGAIN AMANDA for coming on my blog :) Hope we can bake again soon!

Thursday, May 31, 2012

Choc banana squares

I realise that I make a lot of recipes using banana! hehe! Ever since there was a shortage of bananas here - due to flooding/cyclones, I realise how much I missed bananas!! I love bananas! I eat them almost everyday and I love using them in cooking ^^ Or just to top off pancakes or waffles.. Mmmmm~~

Anyways saw this recipe for Chocolate-Bottom banana squares on Small small baker and it looked DELICIOUS =D I loved how there were 2 layers~ and cut into little squares for a bite size snack!


Chocolate banana squares
Recipe adapted from Smallsmallbaker
Ingredients
113g butter
60g caster sugar
1 egg, lightly beaten
1 tsp vanilla essence
3 bananas, slightly mashed
180g plain flour
1 tsp baking powder
1 tsp bicarb soda
1/2 tsp salt
25g cocoa powder
2 tbs milk

1. Beat butter and sugar until light and fluffy.
2. Add egg, vanilla essence and mashed bananas. Beat until creamy.
3. Sift flour, baking powder and baking soda together and fold into cake mix. Mix well.
4. Divide cake into 2 equal portions. Add cocoa and milk to one portion.
5. Pour chocolate batter into lined cake tin first and spread evenly.
6. Pour plain batter on top of chocoalte batter and spread evenly.
8. Bake in pre-heated oven (180oC) for 25-30 minutes or until skewer inserted into the middle comes out clean.
square for you!
If I had chocolate chips, I would sprinkle them over the top ^_^ But these were still a yummy and simple snack to make :)

Friday, April 20, 2012

Green tea layered cake

So this month's Aspiring Baker's theme is "layered cakes", hosted by Sam of Sweet Sensations, something I don't often bake so thought that this would be a good challenge! I think the last layered cake I made was a Victorian sponge cake.. and before that an Opera Gateau. So, to try something different I started looking up recipes for Green tea layered cake. The recipe I chose looked quite simple (haha! yes I go for easy and simple recipes =p) and in the end tasted pretty good. It didn't turn out as "green" as I would like and an aunty even commented "Is it green tea flavour? Why is it brown?" >_< but I think maybe I didn't add enough green tea or maybe other's put green tea colouring.


Well the icing was green =p and the cake was nice and moist as well :) It was lots of fun! Here's the recipe so you can try it out as well! I don't think this is limited to green tea flavour, you can add cocoa powder for chocolate, or vanilla essence or even do different colours! Have a go!

Green tea layered cake
Recipe adapted from www.greenteatoday.com/recipes/green-tea-cake-recipe

Ingredients
1 cup plain flour
1 cup self-raising flour
1 tsp salt
1 tsp bicarb soda
5 tsp green tea powder (add more for a more pronounced flavour!!)
1 1/4 cups caster sugar
1 cup vegetable oil
1 cup yoghurt (I didn't have any so substituted this with 3/4 cup milk)
2 tsp vanilla essence
3 eggs

Green tea icing (double or even triple this for thicker layers of frosting)

1 1/4 cups icing sugar
2 tablespoons margarine, soft
2 teaspoons green tea powder

1. Preheat oven to 180oC. Grease and line round cake tin.
2. Sift flours, bicarb soda, salt and green tea powder into large bowl.
3. In another bowl, beat sugar, oil and eggs until smooth. Stir in vanilla essence.
4. Gradually beat in the flour mixture, alternating with the milk.
5. Mix well and pour batter into prepared cake tin. Bake ~50-60 minutes or until skewer inserted into the center comes out clean.
6. Cool cake on cake rack for ~30 minutes before slicing.
Looks nice just as it actually =p
7. Meanwhile, make green tea icing by beating icing sugar, margarine and green tea powder together until smooth. Keep in fridge till use.
8. Slice cake into 3 even layers.
3 even layers~ I even used a ruler!! ^^
 9. Spread icing on bottom layer and top with second layer. Ice second layer and sift over green tea powder. Add final layer, spread over icing. Sift over green tea powder and white chocolate ganache (i had some leftover so might as well put it to use =p).

First layer iced~
Second layer iced and sprinked with green tea powder~ just for some extra flavour~
Complete! Drizzle with white chocolate ganache for extra drippy effect :P


Slice for you!!!!

Sunday, January 29, 2012

Australia Day Bake~

I am so happy that Australia Day is a public holiday!! (and especially a University holiday!) So since I had a day off I thought I would bake a cake! I went with my dad to the markets in the morning and found some cheap strawberries and blueberries!!! Fresh summer fruits! yum! I saw this recipe from Happy Home Baker for Fruit Pastry Cake and I've always wanted to try it!
happy australia day!
I love this recipe because it's so simple and easy and you can use whatever fruits available!!

Fruit Pastry Cake

Ingredients
100g butter, softened
180g caster sugar
50g yoghurt
3 eggs, lightly beaten
1 tsp vanilla essence
210g plain flour
1 tsp baking powder
500g fruits (I used strawberries, blueberries and peaches)

1. Preheat oven to 180oC and grease, line 9 inch round cake tin.
2. Cream butter, sugar and yoghurt with electric mixer till light and fluffy.
3. Add eggs gradually and bieat till incorporated in the batter. Add vanilla essence and mix to combine.
4. Sift over flour and baking poweder and mix till smooth using wooden spoon or spatula.
5. Pour batter into prepared pan and smoopth the top with a spatula.
6. Arrange fruits on top WITHOUT pressing down.
7. Bake for 45-50 minutes or until skewere comes out clean when inserted. Cover the top with foil in the last 15 minuts to prevent the top from burning.
8. Leave the cake to cool in pan and transfer to wire rack.

lots of fresh summer fruits! Yummy ^^

Tuesday, November 8, 2011

A apple (cake??) a day keeps the doctor away :)

Who doesn't love apples? I have one almost everyday! And i love to use them in cakes as well =) This recipe for Apple spice cake had been in my "to-bake-list" for a while. I had been looking up apple cake recipes after a colleague at work bought one from her local bakery for another collegue's birthday. It was really sweet and moist and tasted just like a grandma's apple cake!! 

I baked this cake one weekend when I was in my "cake baking" moods. Actually no... it wasn't even a weekend but a weekend XD made it for the next day's lab meeting at work! Everyone seemed to enjoy it ^^ and even asked for the recipe! So here it is!!

APPLE SPICE CAKE
Ingredients
  • 1 1/3 cups vegetable oil (I only used 1 cup and it seemed to be ok.. even though my mum said it was a little dry =_=)
  • 3 cups plain flour
  • 1 tbsp cinnamon
  • 1 tsp baking soda
  • 1 tsp salt
  • 2 cups sugar (I used 1 cup brown sugar + 1 cup caster sugar)
  • 3 eggs
  • 2 large Granny Smith apples, cored and cup into 1/2-inch pieces (3 cups)
  • 1 cup chopped assorted nuts (I FORGOT TO ADD THIS T_T)
  • 1 tsp vanilla extract (I forgot this as well T_T)
Method
  1. Preheat oven to 180oC. Spray a 12-cup Bundt pan with cooking spray and set aside.
  2. Sift together flour, cinnamon, baking soda and salt in a large bowl.
  3. Combine vegetable oil, sugar and eggs in bowl and beat with electric mix on high speed for 3-4 minutes until well incorporated.
  4. Gradually add the dry ingredients into the bowl while beating.
  5. Add apples, nuts and vanilla and mix with wooden spoon until incorporated.
  6. Pour batter into prepared pan and bake until skewer inserted in the center comes out clean (~60-75 minutes).
  7. Invert cake onto rack and allow cake to cool before serving.
Using my new cake stand ^^ hehe...
They suggest to serve the cake with caramel sauce but I think I like it as it is. Enjoy this delicious cake ~~ mmm.. APPLES =D

Thursday, September 29, 2011

Victoria sponge cake with strawberry butter cream filling~

One day I whipped up a bowlful of Strawberry Buttercream because I wanted to have a different filling for my strawberry macarons... I made such a mess making it and in the end I didn't think it went very well with the macarons. So ... what to do with a LARGE BOWL of strawberry buttercream? Use it for a cake of course!!! haha! i looked up a random recipe for a Victorian sponge cake (which is usually filled with jam and cream) and made it! it was really simple and turned out really nice and spongey ^^ 


For the sponge: (from http://www.goodtoknow.co.uk/recipes/130363/victoria-sponge)


Ingredients
125g self-raising flour
125g butter, softened
125g caster sugar
2 medium eggs
2 tbs milk


  • 1. Cream butter and sugar together with electric beater till pale and fluffy. 
  • 2. Add the eggs one and a time, beating between each addition. Sift in the flour and add milk and mix together.
  • 3. Divide mix between 2 pre-lined 7 inch round cake tins and bake in pre-heated 180oC oven for 20-25 minutes. Allow to cool in tin and turn them out onto a wire rack.
  • Strawberry Buttercream
  • 3 egg yolks
    90g caster sugar
    2 tbs water
    125g softened, unsalted butter
    90g strawberry jam  

  • 1. Beat egg yolks on high speed with electric mixer for 10 minutes until pale and creamy.
  • 2. Place sugar and water in small saucepan and bring to boil. Simmer until syrup reaches 121oC. Slowly pour syrup into the creamed yolks while beating at medium speed. Beat on high for 10 minutes, until cool.
  • 3. Add softened butter bit by bit while mixing on medium speed. Beat on high for 2 minutes. Add strawberry jam and beat for 2 minutes.
Layer one~~
2nd layer with iced topping!