Showing posts with label brownies. Show all posts

Tuesday, July 14, 2020

Brownie Cookies! - Baking with Tray ep. 9

Hi everyone! 

Had a fun bake session with my niece today ^^ This recipe was really good for kids! Super simple and the hardest thing was probably microwaving the butter and chocolate. All you need is just need one bowl and one spoon! 
These cookies were a great texture: nice and chewy! I sprinkled the top with a bit of salt and that just took the flavour to the next level. As it's school holidays at the moment, maybe you can make these with your kids!

Brownie Cookies
Recipe by Sweetest Menu

Ingredients
150g dark chocolate melts (a block of eating chocolate also works)
75g unsalted butter
200g caster sugar (*EDIT: I made these again recently and reduced the sugar to 180g and it was still nice and sweet)
2 large eggs
105g plain flour
40g cocoa powder
1/2 tsp baking powder
pinch of salt
75g chocolate chips

1. Preheat oven to 180oC (normal oven) or 160oC (fan-forced). Line 2 baking trays with baking paper.
2. Place butter and dark chocolate in large microwave safe bowl. Microwave in 30 second bursts, mixing in between until melted and smooth.
3. Add sugar and mix together. Add in eggs one at a time, mixing after eat addition until well incorporated.
4. Add flour, cocoa powder, baking powder and salt. Stir until smooth.
5. Add chocolate chips and mix well.
6. Spoon tablespoonful of mix onto baking tray (I used a cookie scoop/ice-cream scoop and it was really useful!). Make sure you leave enough room for the cookies to spread. Bake for 13-14 minutes until cookies have spread and cracked on top.
7. Leave cookies on tray to cool completely to cool before eating (I know it can be hard waiting but it's worth it!!). Sprinkle with a bit of salt and enjoy!

If you have a sweet craving, these are quick to make and will definitely satisfy those cravings!


Happy Baking!! Till the next episode... :)

Friday, April 17, 2020

Mixed Berry Brownies - Baking with Tray ep. 3

Hello!

This week on "Baking with Tray" we baked BROWNIES! I mean .... who doesn't like brownies?? Since I discovered this recipe, it has been my go-to brownie recipe. I love it because it's super simple, just one bowl, one spoon and you can customise the toppings. I used frozen mixed berries (fresh would do fine!) and some walnuts. The berries give a nice tang to the sweet chocolatey brownies and the walnuts give a crunchy texture.  


These brownies have it all: crispy top and edges, chewy sides and fudgey centres! So hope you guys try it out :D

Mixed Berry Brownies
Recipe adapted from Sweetest Menu 

Ingredients
115g unsalted butter
200g dark chocolate melts
100g (1/2 cup) caster sugar
90g (1/2 cup) brown sugar
1 tsp vanilla extract
3 large eggs
70g (1/2 cup) plain flour
20g (1/4 cup) cocoa powder
75g (1/2 cup) milk chocolate chips 
125g mixed berries
50g walnuts (optional)

1. Preheat oven to 180oC or 160oC fan forced. Grease and line a 20cm square baking tin.
2. Place butter and dark chocolate in a microwave safe bowl. Microwave until melted (do this in 30 second rounds, stirring after each round. Mine took about 1 minute total). Allow to cool slightly.
3. Add in sugars and vanilla and mix until incorporated.
4. Add in the eggs, one at a time, mixing well after each addition. (You don't want your bowl to be too hot otherwise the eggs will scramble!)
5. Add in the flour and cocoa powder and mix until incorporated.
6. Add in milk chocolate chips and stir well. (You can also choose to add some berries and walnuts at this stage too.) Pour mix into lined baking tin using a spatula to scrape the bowl to get everything out.
7. Place berries and walnuts on top. Gently press down.
8. Bake for 30-40 minutes or until cooked through. You can tell by the crack on the edges and the brownie no longer wobbles. Leave to cool completely before cutting. Dust with icing sugar before serving.


Hope you guys try this out because it really is simple and delicious!!

Happy baking! Till the next episode... :)

Sunday, June 8, 2014

Work Catering #45: For peanut butter lovers

I'm not sure how we came about the topic but my friend and I started talking about peanut butter and baking. To be honest, I haven't baked a lot with peanut butter. I know it's quite popular in America but the craze hasn't really caught on in Australia. It's not that I don't like peanut butter.. I used to have it on toast and in sandwiches all the time when I was younger! So when I came across this recipe for Peanut butter stuffed brownies, I decided I would make this for all the peanut butter lovers out there!

Peanut butter stuffed brownies
Recipe adapted from Sallys Baking Addiction

Ingredients
1/2 cup (115g) salted butter
230g dark chocolate
3/4 cup (150g) caster sugar
1/4 cup (50g) brown sugar
3 large eggs
1 tsp vanilla essence
1/2 cup + 2 tbs (80g) plain flour
2 tbs (16g) cocoa powder
1/4 tsp salt

Peanut butter filling
3/4 cup (185g) creamy peanut butter
1 cup (120g) icing sugar
2 tsp vanilla essence
2 tbs (30ml) milk
2 tbs each chocolate chips and peanut butter chips (I used butterscotch chips)

1. Melt butter and dark chocolate in medium saucepan over medium heat, stirring constantly. Remove from heat and allow to cool slightly for 10 minutes.
2. Make peanut butter filling by beating peanut butter, icing sugar, vanilla and milk together with electric mixer until combined. The mixture will be thick. Set aside.
3. Adjust oven rack to lower third position and preheat oven to 180oC. Grease and line 23cm square baking pan with baking paper. 
4. Whisk sugars into the cooled chocolate/butter mixture. Add the eggs, one at a time, whisking until smooth after each addition. Add in vanilla. Gently fold in flour, cocoa powder and salt. 
5. Pour half of the brownie batter into prepared baking pan. Take large chunks of peanut butter filling and flatten with your hands. Place flat pieces in an even layer on top of the brownie layer. 

Pour the remaining brownie batter on top. Top with chocolate chips and peanut butter chips. Bake for ~35 minutes or until skewer inserted in the centre comes out clean. Don't overbake them!
Can u see the peanut butter layer??
There's the peanut butter fudge layer!
Another easy slice I baked was this Chocolate rough slice. It's egg free! And kind of tastes like a rum ball but slice version~ Coconut lovers will love this slice!

Chocolate Rough Slice
Recipe adapted from Baker's Corner

Ingredients
Base
1 cup self raising flour
1 tbs cocoa powder
1/4 cup desiccated coconut
1/3 cup caster sugar
125g butter, melted

Topping
1 tbs cocoa powder
3/4 cup condensed milk
100g dark chocolate, melted
1/2 cup dark chocolate chips
2 cups desiccated coconut

1. Preheat oven to 180oC. Line an 18cm x 28cm baking pan with baking paper.
2. Combine base ingredients in large bowl and press into prepared pan. Bake for 15 minutes until golden.
3. Combine topping ingredients in another bowl and spread over base. Cool and then cut into slices.
Rough looking? haha
Smaller portions look nicer

Coconutty and chocolatey!

Photobucket

Sunday, June 1, 2014

Work Catering #44: Cookie Dough Brownies!

How did I not discover this before!? Cookie Dough + Brownies :D :D!! Another brownie variation ^^" I do like finding different brownie recipes.. adding berries, nuts, cream cheese... and now COOKIE DOUGH :D The cookie dough is raw but don't be afraid because it's eggless and acts like a frosting for the brownies.

Cookie Dough Brownies
Recipe adapted from The Baker Upstairs


Ingredients
Brownies
1/2 cup (113g) salted butter
225g dark chocolate
1 cup caster sugar
3 large eggs
1 tsp vanilla essence
3/4 cup plain flour
1/4 tsp salt

1. Preheat oven to 180oC. Grease and line rectangle baking pan (20x30cm).
2. Melt butter and chocolate in medium saucepan on medium heat, stirring constantly. Remove from heat and let cool to room temperature.
3. Stir in sugar into cooled mixture until combined. Add in eggs one at a time, mixing until fully incorporated. Mix in vanilla.
4. Gently fold in flour and salt. Pour batter into prepared pan, smoothing the top with a knife.
5. Bake for ~30 minutes or until toothpick comes out clean (it's better to underbake these brownies than overbake as they will turn out too dry).

Cookie dough
3/4 cup (170g) unsalted butter
3/4 cup brown sugar
3/4 cup caster sugar
3 tbs milk
1 1/2 tsp vanilla essence
1 1/2 cups plain flour
1 1/2 cups mini chocolate chips

1. Beat butter and both sugars in medium bowl with electric mixer until pale and fluffy. Add milk and vanilla and mix until combined.
2. Reduce speed to low and mix in flour until just combined. Fold in chocolate chips with spatula.
3. Spread an even layer on top of the baked brownies.
So yummy!!! it's like cookie and brownie all in one!
The chocolate chips really give great texture and flavour~
I was reading a cook book and found a recipe for some cookies! They looked really good.. simple and delicate.. so I decided to make them...

However mine didn't exactly look like the pictures in the book XD
Coconut and Chocolate Sandwich cookies
Recipe adapted from Sugar and Spice by Callie Maritz and Mari-Louis Guy

Ingredients
250g unsalted butter, softened at room temperature
1 cup (200g) caster sugar
2 1/2 cups (250g) fine desiccated coconut
2 cups (280g) plain flour
1/4 cup (30g) cocoa powder
1 tsp baking powder
100g dark chocolate, chopped + extra for decoration
80ml thickened cream

1. Preheat oven to 180oC. Line 2 baking trays with baking paper.
2. Using electric mixer, beat butter and sugar until light and creamy.
3. Add coconut, flour, cocoa and baking powder and mix through.
3. Roll the dough into about 60 balls with your hands and place on baking tray. Press each one to slightly flatten. Press a small block of chocolate into the middle of each biscuit. Bake for 15 minutes, then remove and allow the biscuits to cool completely.
4. Make chocolate ganache by melting chocolate and cream in a heat proof bowl over pot with simmering water. Allow to cool or even refrigerate to thicken.
5. Sandwich two biscuits together with chocolate ganache.
Yummy biscuits :D
OK so they don't look super pretty...
but still taste good =p

These turned out a bit bigger than I would have liked... tastewise, a little bit dry but the ganache helps with that :) It kind of tasted like an Anzac cookie because of the coconut.

More coconut recipes coming soon :D oh and brownie recipes ^_^

Tuesday, April 8, 2014

Work Catering #40: Blondies vs. Brownies

Which do you like better? Blondies or Brownies? I made both for work last week~! Well technically the blondies weren't "blondies" because they didn't have any white chocolate in them... and it was a bit biased because the brownies had cream cheese and Kit Kats...so of course the brownies won XD But they were both yummy :D 

I was still in a Kit Kat phase from last work catering, so I decided to use them in a brownie!

Kit Kat Cream cheese Brownies
Recipe adapted from Bakerella
Ingredients
Brownie
3/4 cup plain flour
1/2 cup unsweetened cocoa powder
1/4 tsp salt
1/2 tsp baking powder
150g unsalted butter
1 1/2 cups caster sugar
3 eggs
2 tsp vanilla
4 x 45g package Kit Kat bars

Cream cheese topping
250g cream cheese, softened at room temp
2 eggs
2 cups icing sugar
1 tsp vanilla

1. Preheat oven to 180oC and grease and line a 20x30cm baking pan.
2. Sift flour, cocoa, salt and baking powder in medium bowl and set aside.
3. Melt butter in microwave. Stir in sugar, then eggs one at a time. Add vanilla and mix until well combined.
4. Add dry ingredients. Stir until combined then pour into prepared pan. Gently press 16 individual Kit Kat bars on top of brownie batter.
5. To make the topping, beat cream cheese with electric mixer until smooth. Beat in eggs one at a time to mix until combined.
6. Gradually add icing sugar and then vanilla. Mix until smooth. Pour on top of brownie batter.
7. Bake for 45-50 minutes or until skewer inserted into centre comes out clean. Place a sheet of foil on top of pan for the last 10-15 minutes to avoid over browning.
8. Remove from oven and cool completely. Chill in refrigerator for a few hours or overnight before slicing and serving - I was too impatient and I think that's why it was quite hard to slice XD was too warm and sticky! haha

Falling brownies....
The cream cheese topping wasn't quite what I was expecting. It was quite soft and pretty sweet but I think the layer was just the right thickness! Any thicker and it would have been overly sweet.
Did I tell you that some of these were stolen? :O
I put them in the work fridge overnight and the next day most of them were gone~
To balance out the sweetness we have some tart apple harvest "blondies". I like the texture of the nuts on top and also bits of cream cheese ^^

Apple Harvest Blondies
Recipe adapted from Recipe Girl

Ingredients
150g unsalted butter
2 1/4 cups packed brown sugar (divided)
3 large eggs
2 cups plain flour
1 tsp baking powder
1 tsp vanilla essense
2 medium apples, peeled and chopped (I used granny smith apples for tartness)
125g cream cheese (you can freeze to make it easier to chop later)
3/4 cup pecans or walnuts, finely chopped
1 tsp ground cinnamon

1. Preheat oven to 170oC. Grease and line 20x30cm baking pan. 
2. Melt butter in saucepan over medium heat. Once melted, remove from heat and stir in 2 cups of brown sugar. Mix well and add eggs one at a time, mixing well after each addition. 
3. Add flour, baking powder and vanilla essence and mix well. Fold in apples.
4. Pour batter into prepared pan. Chop cream cheese into small bits and mix with nuts, cinnamon and remaining 1/4 cup brown sugar. Sprinkle evenly over batter.
5. Bake for 30-35 minutes or until golden brown.
Pretty moist and full of fruit :D
and Golden!
I wonder why they are called Apple harvest blondies... 

Thursday, February 13, 2014

Work Catering #37: First of 2014! A raspberry theme~

YAY! My work catering series is back!! One of the things that I have been most looking forward to at work =p (maybe im in the wrong job.. hmm..)
tasty cookies~
My bakes this week had a raspberry theme! Not sure why but I was just in the mood of using raspberries ^_^" First up is a Raspberry Cheesecake Brownies.. combining two of my favourite sweets: Cheesecake and Brownies! I found this recipe on this new blog I have been following: Sally's Baking Addiction. You guys should really check it out!!! It's such a wonderful and colourful blog and the photos just make you drroooolllll!!! and also make you want to bake (like I did XD).
Raspberry Cheesecake Brownies
Recipe adapted from Sally's Baking Addiction

Ingredients

Fudge Brownies
1/2 cup (115g) unsalted butter
225g dark chocolate melts
1 cup caster sugar
3 large eggs
1 tsp vanilla essence
3/4 cup plain flour
1/4 tsp salt

Raspberry Cheesecake Layer
250g cream cheese, softened at room temp
1/4 cup caster sugar
1 egg yolk
1/4 cup raspberry jam
1/4 cup raspberries for topping

1. Preheat oven to 180oC. Grease and line baking pan (20x30cm).
2. To make the brownies, place the butter and chocolate in medium saucepan on medium heat and stir constantly till both are melted. Remove from heat and allow to cool (~10-15 minutes should be fine).
3. Stir in sugar and mix until combined. Add in eggs one at a time, mixing until incorporated before adding next egg. Mix in vanilla. Gently fold in flour and salt. Pour batter in prepared pan.
4. To make the cheesecake layer, beat together the cream cheese and sugar with electric beater until smooth. Add in egg yolk and beat until combined. Beat in raspberry jam.
5. Dollop spoonfuls of cream cheese mixture on top of brownie batter. Glide a knife through the layers to create a swirl pattern. Sprinkle and press a few raspberries on the top.
6. Bake for ~30 minutes or until skewer inserted into the centre comes out clean. Cover the brownies after 20 minutes of baking to stop the top from over browning. Allow brownies to cool completely before cutting into squares.
Loving the layers

bright pop of rapsberries ^^
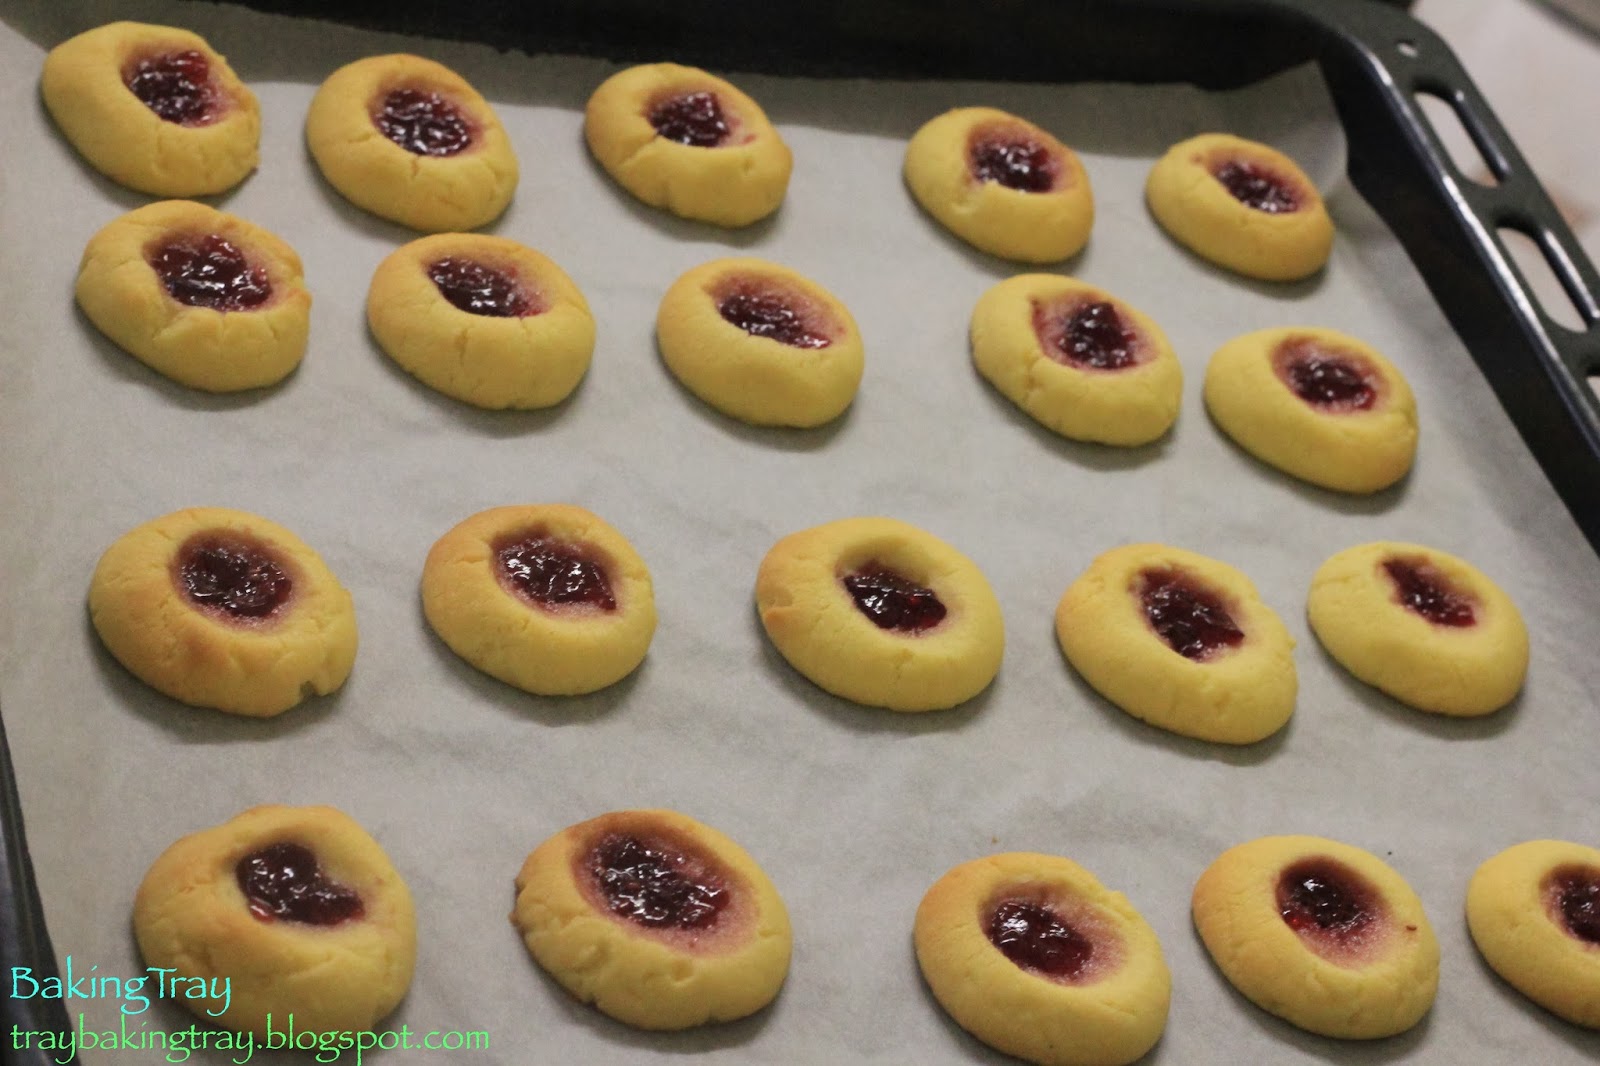
The next recipe I tried also involves raspberry jam!! They are essentially thumbprint/jam drop cookies but made up of shortbread. I have previously made jam drop cookies but wasn't too happy with the result. However this shortbread recipe was really good as the cookies did not spread so much so the jam stayed in the holes xP and it's EGG FREE!

Raspberry Shortbread Cookies
Recipe adapted from Melding Magic
Ingredients
225g butter, softened
2/3 cup caster sugar
2 cups plain flour
1/2 cup raspberry jam

Glaze
1 cup icing sugar
3 - 4 tsp warm water
1 tsp vanilla essence

1. Cream butter and sugar in large bowl with electric mixer.
2. Add in flour and beat on low speed and well combined. Cover and refrigerate for at least 1 hour.
3. Preheat oven to 180oC and line 2 baking trays with baking paper. Shape teaspoonsful of dough into balls. Place 1 inch apart onto tray. Using your thumb or end of wooden spoon handle, make an indent in the centre of each cook. Fill with jam.
Filling holes with jam
4. Bake for 14 minutes or until edges are lightly brown. Allow to cool.
Cooked cookies :D
Allowing them to cool....
5. Make glaze by mixing sugar, water and vanilla in small bowl. Drizzle over cookies.
Ready to eat :D
Close up of the drizzle! looks like white chocolate but it's not XD
Well stay tuned for more work catering bakes and other random recipes~~^_^ and try these out! they're really simple!!!!